

Our old dining room table was unwieldy and falling apart, so we decided that rather than move it, I would try to fix up an old wooden table we had on the porch. It was covered in about an inch of dust, pollen, spiderwebs, and acrylic paint splatters, but was nice solid wood and was a good size and shape for our new place. I've been wanting to try ebonizing some wood with vinegar and steel wool for a while, so this seemed like a good opportunity.
The basic idea is that when you combine vinegar, steel wool, and the tannins that are naturally present in wood, you get a chemical reaction that oxidizes the wood and makes it look sort of... old and dark and crazy. Different woods have different amounts of tannins (with some having barely any at all) and react differently to the process, so the results are kind of a surprise (I wouldn't recommend doing this to any furniture that is super precious to you.) You can also add more tannins to the mix by pre-treating the wood with black tea- some types of wood might require that, though this table did not. I have no idea what kind of wood it is, unfortunately.
Anyway here's a lil step-by-step for you:
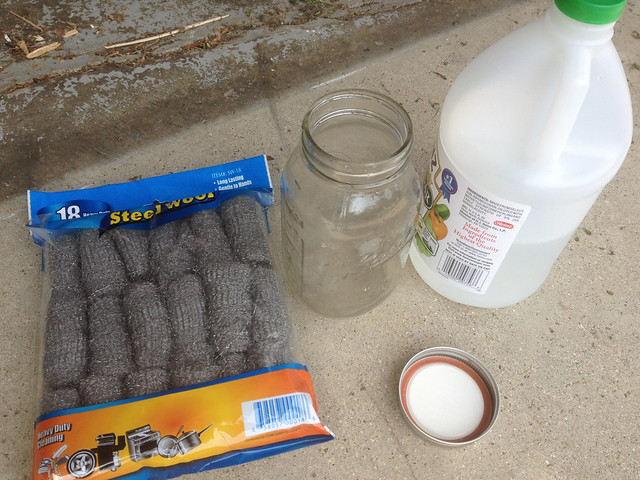
Ingredients
- One piece of wood furniture
- Electric sander and sandpaper of various grits (you could probably also use chemical strippers but I was on a mission to do this as non-toxically as possible.)
- Safety gear!! Use gloves, goggles, and a dusk mask when sanding. Seriously. Trust me. "Carol never wore her safety goggles and now she doesn't need them", and so on.
- Some rags
- White vinegar
- A glass jar with lid
- Super super super fine steel wool (get the one with the most 0's)
- Crappy paintbrush that you're okay with throwing away (I used a foam one)
- Your finish of choice- in the pursuit of non-toxicity, I used pure tung oil mixed 50/50 with a pure, non-toxic citrus solvent*. I was pretty happy with this choice a few days later when I managed to spill some solvent in the car, and instead of fumigating me to death, it just smelled like oranges. (Still, the solvent is strong and can cause irritation, use it somewhere well ventilated.) I couldn't find either thing locally so ended up ordering those exact ones on Amazon.
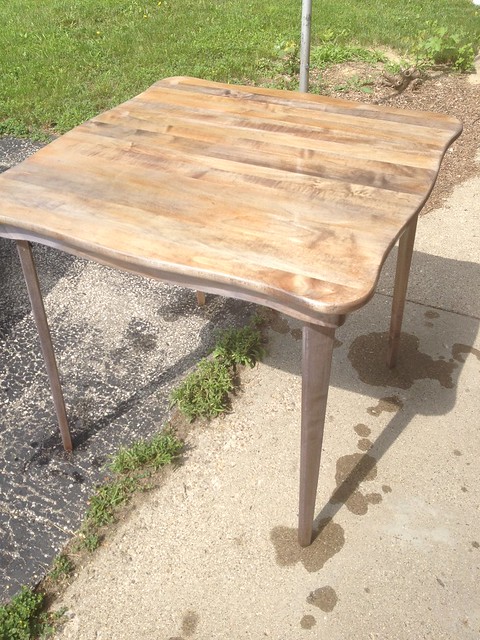
Step 1: Sand the heck out of your table
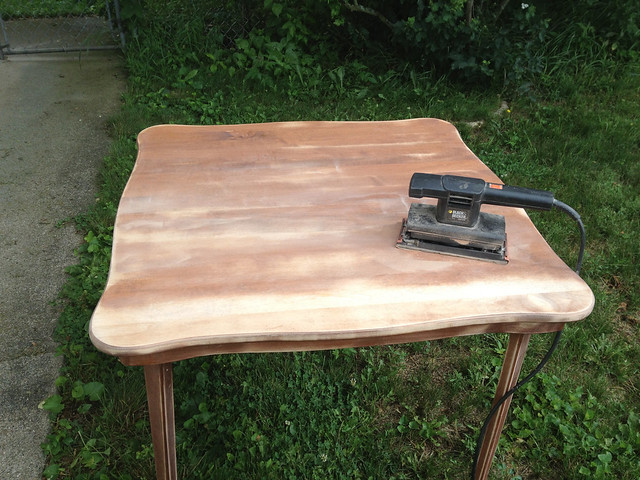
This is as close as I got to a before shot, unfortunately, but you can see the old finish. This step will take you way, way longer than you think it will. And your arms will go all numb and wobbly and crazy. I think all told, it took me like four sanding sessions over several days to get the thing down to naked:
(Granted, I'm pretty weak-armed.) Sand with the grain of the wood and keep the sander moving to avoid scuffing up your wood strangely. If you're going for perfection, start with a rough grit paper to get all the finish off, and then move towards finer grits to make it nice and smooth. I was pretty lazy about it, because I was fuckin' sick of sanding and wanted it to have kind of a rustic vibe anyway. There were spots where there was still a trace of stain left, which I thought might give it some interesting color variations (and it totally did, so chalk one up for laziness!) Make sure you dust all the sand off before moving on to the next steps. Also, WEAR YOUR SAFETY GEAR. I managed to get sawdust in my eyes even WITH goggles, I can't imagine how awful it would've been without them. And you don't want to breathe tiny particles of wood/stain/polyurethane/etc. Gross.

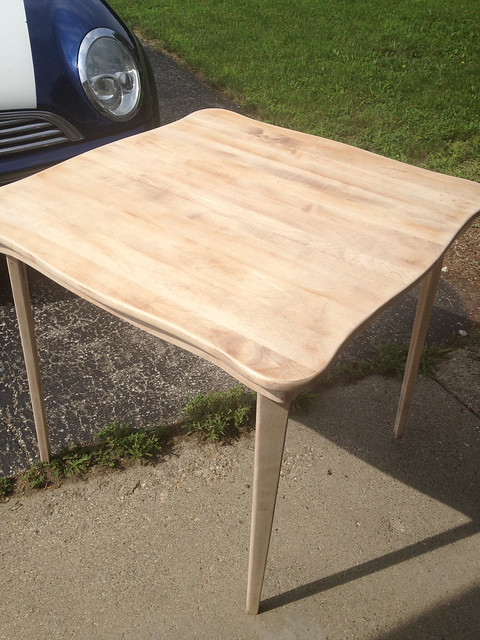
Sandy!!
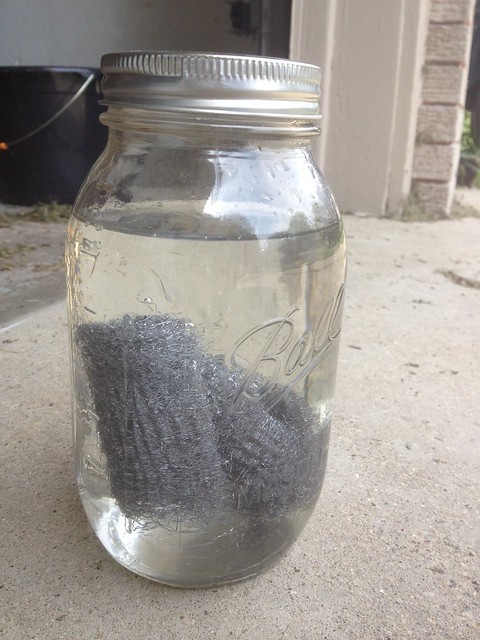
Step 2: Mix up your stain and let it brew.
Fill your jar most of the way full with white vinegar and then shove a blob or two of steel wool in there. Now, I am told that the longer you leave that in there, the stronger your stain will be (most people recommend at least 24-48 hours, and possibly much longer), but as you'll see my stain was plenty strong and I only left it for about... 18 hours. Some folks had their steel wool dissolve in the jar, or at least discolor the vinegar, but that didn't really happen for me and it still worked just fine.
Step 3: Do a test swatch somewhere inconspicuous
This is less to show you what your finished result will look like (because it will continue to "develop" for days and who has that kind of patience? Be adventurous!) and more to make sure that your wood has enough tannins for it to work at all. Find a bare spot on the underside somewhere, paint a little of your vinegar mix on, and see what happens. If there's no sign of change after half an hour (and it may be faint since it's one coat, but still) then try painting some black tea on the wood, letting it dry, and then doing the vinegar. You might have low-tannin wood in which case you'll have to do a tea coat first.
Step 4: Grab your paintbrush and slather that bitch up!

Here's my table after one coat and about 40 minutes (the remaining traces of stain are really apparent at this point!)
And here it is wet with the second or third coat... whenever it had a fresh coat, it looked much paler/browner, and then would go all gray purple as it dried.

And here it is dry, after about four or five coats, which is where I stopped. Purpley! Interesting! Let it dry and continue to develop for at least a few days. Because sourcing the tung and solvent was such a pain (I tried to buy it locally first and looked EVERYWHERE) it ended up sitting for about two weeks before the finish went on, and it definitely darkened and got a little bit more brown and less lavender.
Step 5: Put on the finish
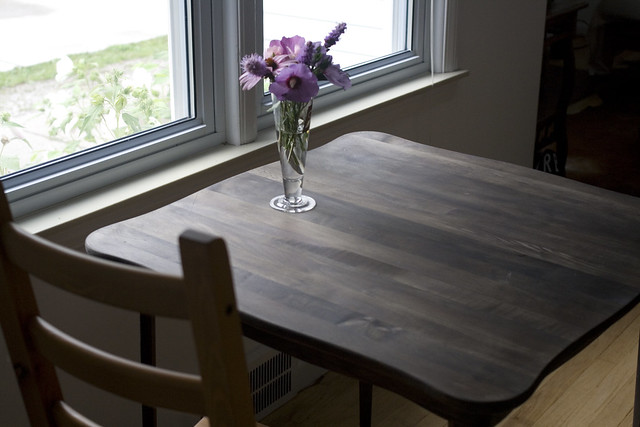
I don't have pictures of this process I'm afraid (bad blogger! Bad!) but it quite literally took five minutes. There are a lot of options for finishes- polys, tung blends, waxes, oils, etc. I like the pure tung & citrus solvent because it's nontoxic and doesn't leave it super shiny, but still gives it a bit of protection. I mixed the two half and half and rubbed it into the wood with a rag. Give each layer a few days to dry, at least (and check on it periodically to wipe away any oil that seeps out and pools.) I ended up only doing one coat, because I liked the way it looked (it darkened/browned/de-purpled it slightly more) but I think I should probably do a second because it has a few scuffs.
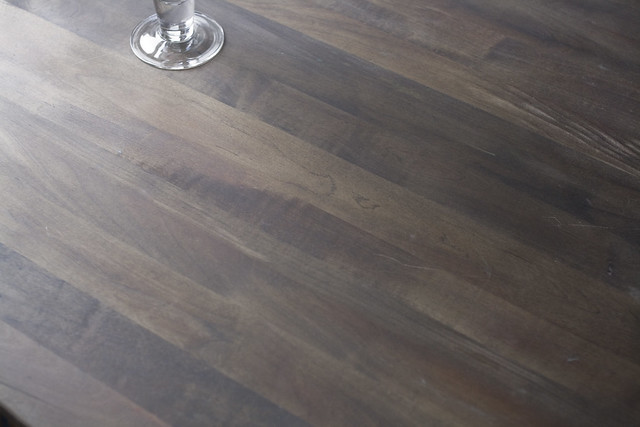
This is a pretty accurate representation of the final color (pretty different than right after it was applied!) Remember though, like I said, what you get will most likely be different- some come out really grayish, some blue, some purple, some red, some almost jet black. But I haven't seen a result yet that I didn't like. This floor might be my favorite so far... that is GUTSY.
Anyway, if not for all the arm numbness I could see this becoming a very addictive hobby. I just found out that Ikea sells unfinished wooden bookshelves.... in any case, please send me a link if you decide to try it, I never get tired of seeing the results!
*Full disclosure, those are affiliate links, so if you make a purchase through them I get a weensy kickback. But those are the actual ones I ordered and I'll vouch for 'em working!
So your stain is simply vinegar and steel wool?
ReplyDeleteI love the final color, its just so hard to believe this is the outcome!
Yep! Results will vary based on the type of wood, how long you let the mixture steep, etc. And definitely put a sturdier top coat on than I did- mine is scratched and stained all to hell now. Should've done a polyurethane top coat or something, probably.
DeleteThe finish is pure tung and citrus solvent. Could you tell me how to come by the solvent, is it like orange glo and the tung it is a spice, am I correct? Just wanting to be sure to do correctly, I am just starting these types of projects.
ReplyDeletePine is a soft wood. We had a great, looking pine table top made from a piece of molding I bought from the mill I work at. After 6 coats of water based poly, the finish is still soft enough to see ball point pen marks in the wood. We bought a plastic cover to preserve the finish. It looks great, but is soft.
ReplyDelete