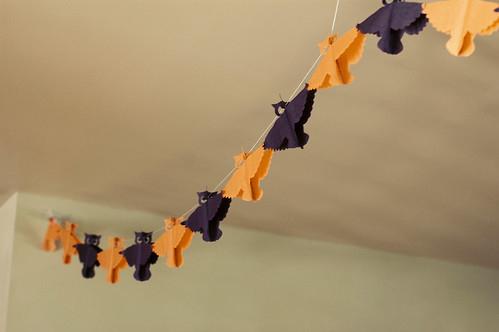
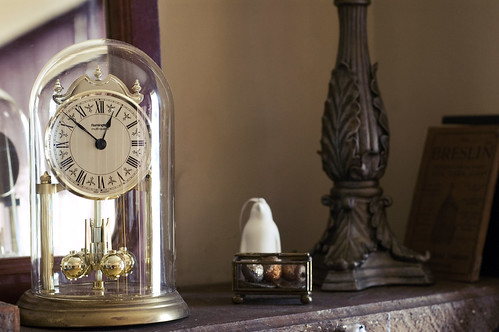
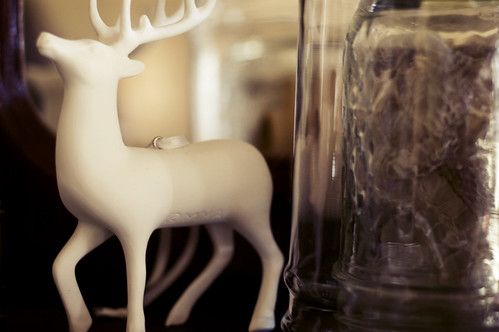
Wrapping up the goodness that is Christallowmasween, we have...decor! I basically gathered up all the vaguely spooky items that we own and put them on the mantel, plus lights and a few dining room things. I actually really like the mantel and have no intention of moving the stuff on top, though I'll take the lights and hanging "Creepy Fabric" down (that's what it was labeled as at Target. Awesome.)
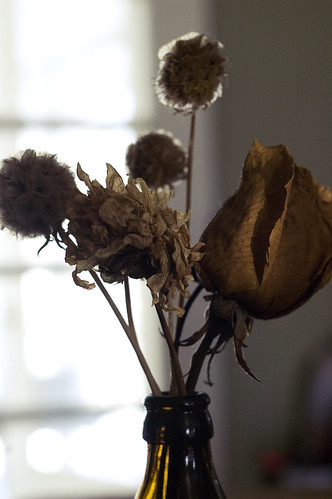
Sup, dead wedding flowers?
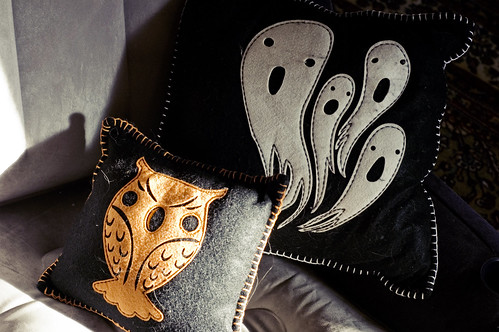
Army of owls!!
Apparently owls are very spooky this year.
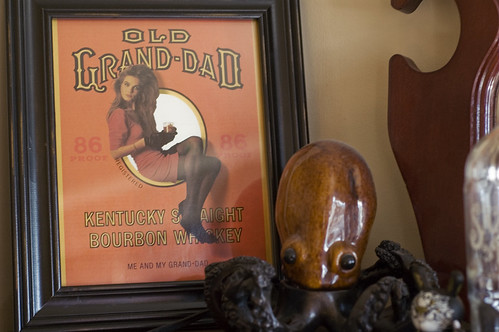
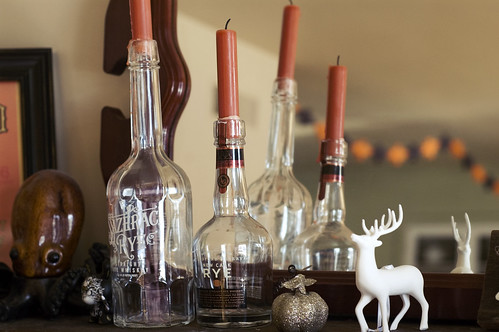
But are they as spooky as whiskey ads from 80's playboys and octopi??
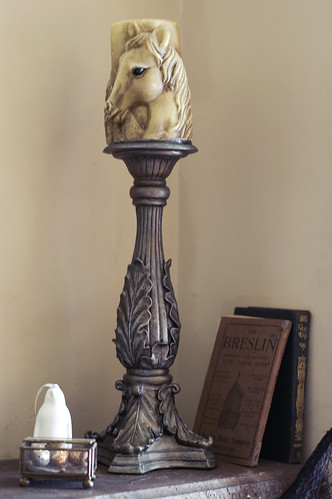
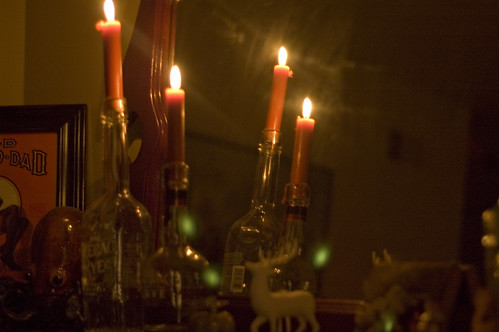
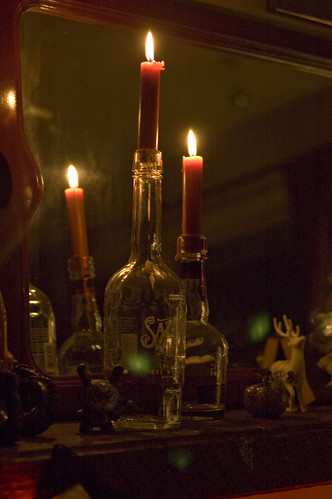
This candle (and it's identical twin) was a gift from Travis's late grandmother. They are so divinely creepy and awesome and amazing. Low res action shot here.
That's a snake skin the jar, there. From Long Charles (our under-porch snake), we think.
All of my plants end up dead or mutated :-(
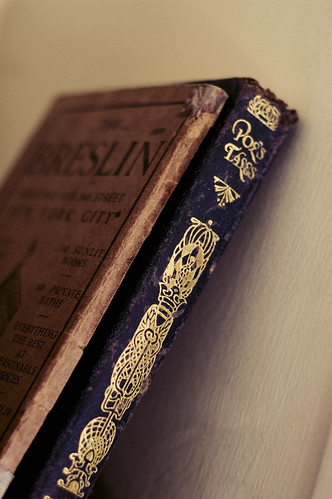
Is that not the most perfect book of Poe tales you've ever seen?
Know what's totes creepy? Iodine and insulin. FROM THE PAST!! WOOooOOOooo.
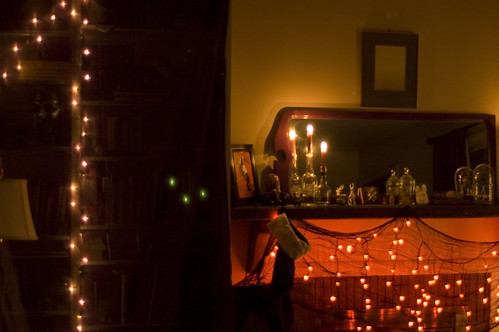
And here are a few night shots:
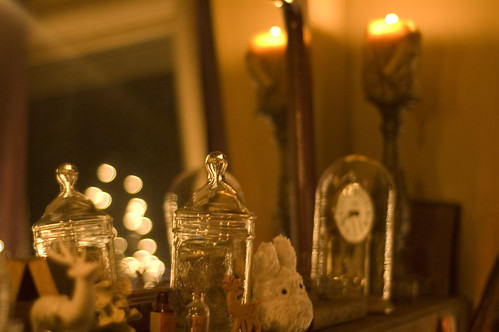
See my new Chibi Totoro??? I screamed a little when I opened it. I didn't even like the movie that much but Chibi Totoro is my favorite thing that ever was. Since he is kind of a ghost he gets to be on the creepy mantel.
The weird thing is that those green dots that are in every picture seem to have come from nowhere, which obviously means they're ghosts, because there is no other explanation, like camera weirdness or something. Nope. Ghosts.
Oh, and we found a tree-topper! Kinda. It's an ornament. But whatever, close enough!
And thus concludes the holiday abomination that is Christoween. Next year I'm thinking...seafoam and red. But we'll see. OMG WHAT IF WE DID VALENTMAS? Or St. Hallowtine's....
(That's, "Brilliant Idea That Should Have Been Obvious But Wasn't" - it wouldn't all fit in the title bar.)
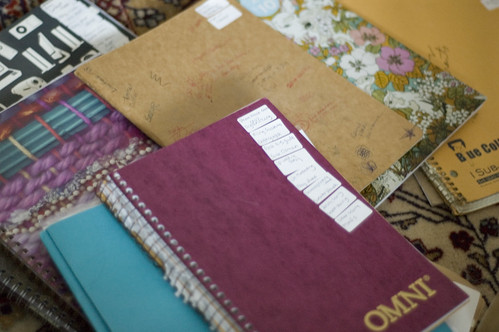
I am sort of a notebook addict. I love a fresh, empty notebook. I fantasize about doing wonderful, organized, productive things with them. Whenever I'm feeling ambitious I buy a new notebook because clearly that is the first step to success with, um, anything.
Unfortunately my notebook usage habits don't really live up to the daydreams. I tend to grab whichever one is nearest whenever I want to write something. Which means I have somewhere in the neighborhood of 30 notebooks (or folders full of loose papers, we're counting those too) that, for the most part, contain absolutely no logical combination of content. If I want to find, say, the notes I took on a particular book I read, I have to look through every single one until I find it (assuming I bothered actually noting what book I was reading...which, as I discovered today, I'm not great about. TITLES ARE IMPORTANT. And I have pages upon pages of notes that make absolutely no sense because I didn't label what they were for. They're just random lists of words. But I digress.)
So today I put on my new christmas-present CD (David Byrne & St Vincent...I'm liking it, I think), plopped myself in front of the heater, and went through every notebook in my possession and made little sticky labels for the front telling me WTF is inside them. (The sad part is that I consider this a perfectly enjoyable friday night activity. Self-employment is weird.)
I don't know why I didn't think of that before. If I can actually keep things to the most appropriate notebook (or at least add a label when I use it for something new) I might actually be able to make use of the darn things.
Just to give you an example of my scattershot approach to notebooking, one of them now says:
- Bath & Body Recipes - Product Reviews - Terrarium Notes - House Maintenance To-Do List - Doomsday Costume Lists - Knit Idea Sketches
That last one is on probably a solid 3/4 of notebooks :-/ Eep.
But yeah. Not a terrible start to "Get Your Shit Together 2013", considering it's 2012. (Nevermind that "Get Your Shit Together" is my resolution pretty much every year. It turns out that it's an ongoing thing. Like laundry. Never done.)
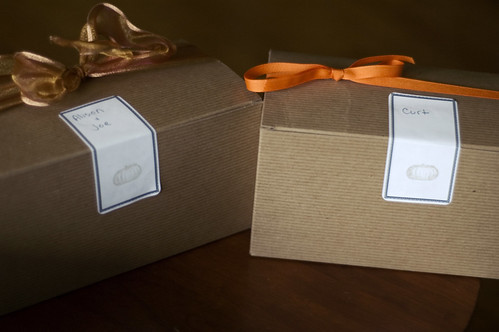
I'm kinda weird, I love wrapping gifts. I spend way too much time and money on it. I grew up in a home where we were very "anything goes" with Christmas decorations- no Martha Stewarty tree themes, lots of mismatched giftwrap and bows and ribbon. Which is great and fun, and I think if Travis had his way we'd definitely go that route, but now that I get to do Christmas "my way" I think I'm rebelling by getting all matchy-matchy about it and all ;-) I like Martha Stewart, dammit.
(It helps that I don't have kids, playing Santa would probably wear out the best of my intentions.)
Anyway! Giftwrap!
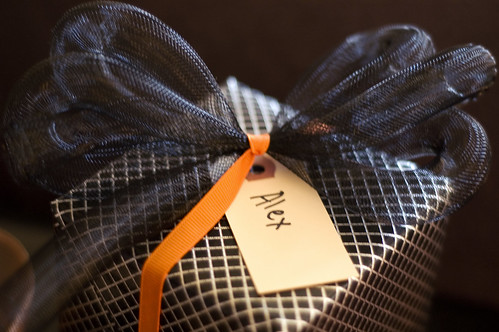
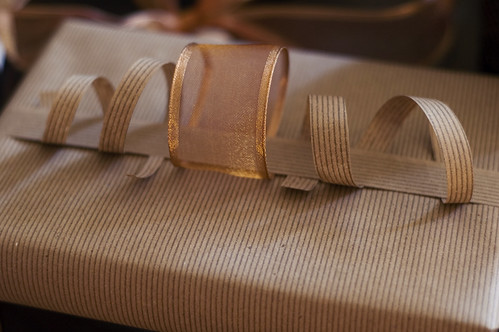
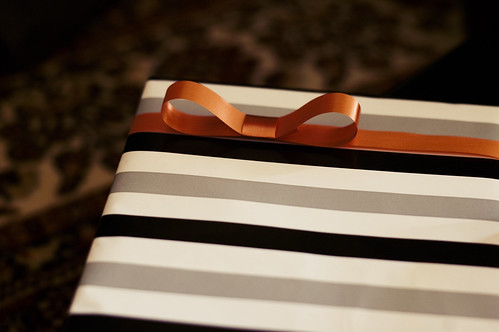
I went with kraft-brown, black, white, gray, and little touches of orange, especially in the ribbons. I had some tiny old paper "luggage tags" or whatever you call them, so used those for names. There are some mini unbreakable ornaments on a few of them.
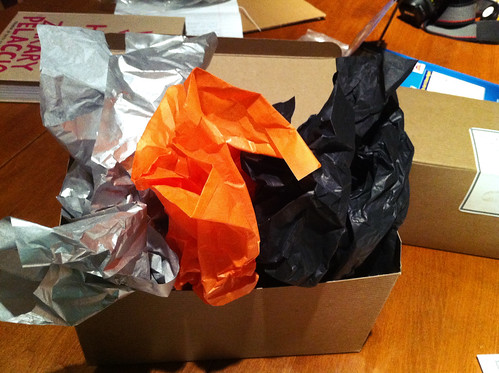
The stamp set I used for my wedding place cards just happened to have a pumpkin! Those labels are leftover from our invitations, too. Here are the insides (sorry, cell pic):
I would never put a subtle ribbon cross of St Peter on a child's Christmas present. What would make you say such a thing? (I didn't really mean to, it just happened.)
Travis let me decorate my own presents (he wrapped them) because he knows how psychotic I get about these things. (Um, so, of course I used a weird mesh tube thing that I didn't actually want to part with because I have crazy dreams of putting it on a hat. Heh.)
By the time I got to my sister's gifts, I was out of useful bags and ended up putting them in these weird planters I got from Ikea awhile ago. They're cool, but the bottoms are rounded which is a wee bit impractical.
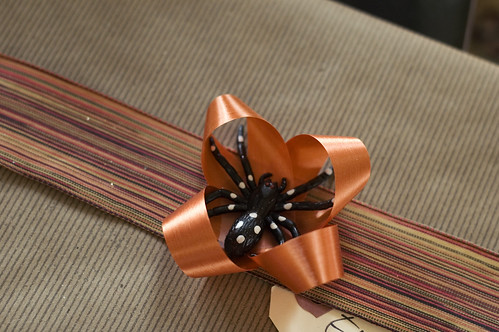
And then there's this, my pièce de résistance:
Fuck yeah spider bow.
Nevermind the tape...I was worried hot glue would melt the weird gummy-rubber. (And obviously those are the only two options.)
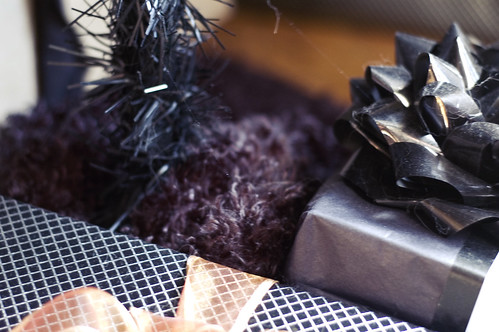
(Bonus shot:
That's our weird faux fur tree skirt, peeking through... and the beginnings of a REAL spiderweb. After being up for like a week. Ridiculous.)
PS, Happy Apocalypse! If you missed it, there's a sale on over at my other blog.
A little over a year ago I made the super great decision to dye my hair dark teal. It was fun for awhile, but the fade out has been a biiiitch. I've dyed over it twice and the greenish tones just keep peeking through. So eventually I chopped it short-ish, with the intention of keeping it that way til all the green has been cut out.
Now, I know you can just scamper over to Aveda and have a mostly-qualified student cut your hair for like $5. But here's the thing... not only am I poor, I require instant gratification AND I'm a control freak AND the smell of hair salons makes me really queasy. Like, ruins-the-whole-day, halfway-to-migraine-town.
So, I just cut that shit myself. I've gotten a surprising amount of positive feedback (though, who knows, maybe they're just all being nice and I look like a total bum. Meh.) So. Here's how I do it. It's fast, it's easy, it's damn near impossible to mess up as long as you don't go too short and you like the look in the first place. I used the same method when I had long hair for very subtle layers... on shorter hair, you'll get sort of a Joan Jett/Chrissie Hynde kinda thing going on.
Disclaimer: Try this at your own risk. You may not like the way it turns out. Maybe Joan Jett isn't a good look for you. I don't want to get any angry emails because you decided to trust some rando on the internet instead of going to a salon like a proper adult. I mean seriously, who the fuck am I? I'm not a hairdresser.
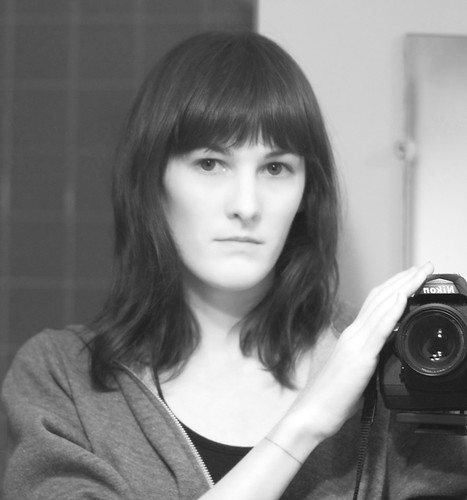
Okay. Now that that's out of the way, the before shot:
As you can see I am Un-Thrilled at my sort-of-grown-out hair. (The bathroom lighting was so unflattering and the poop-brown-and-beige colorscheme so heinous that I hauled off and made these all b&w. Seriously, I don't know who picked out these colors but I have to tell myself they were colorblind, friendless, and thought it was gray because nobody told them otherwise or I might travel through time and smack them.)
Step 1:
Bend over and brush your hair thoroughly towards the floor. Gather it up in a super sexy top-of-the-head ponytail, attempting to smooth out as many bumps as possible. I'm lazy about that, but it will give you a more precise cut. Say "Oh my GAAAWDD I love Lisa Frank! Let's play Mall Madness."
Step 2:
Using a second ponytail holder, gather the hair up again near the end. (Think "weird unattractive bumpy ponytail thing inspired by Princess Jasmine that weird kids used to wear in the 90's.") You want to place it as far from the tips as you want to cut, because you'll be cutting that free-hanging bit off. Unless you have done this before or are very brave, you're going to want to start with less than I'm using here.
Step 3:
Cut just above the second hairtie in as straight a line as you can manage. Use real haircutting scissors that are sharp and not used for any other purpose. They're not expensive (as long as you're not buying the really truly professional ones) and they'll do less damage to your hair. You don't want to cause split ends already, do ya? This is also a good time to make creepy Cindy-Lou-Who faces by puffing out your upper lip and text them to your significant other or parents.
Step 4:
Remove the second hairtie and take a moment to flip around your weird, super-flat-top ponytail. It's fun. Then take out the other one and finger-comb your hairs back into the places they belong.
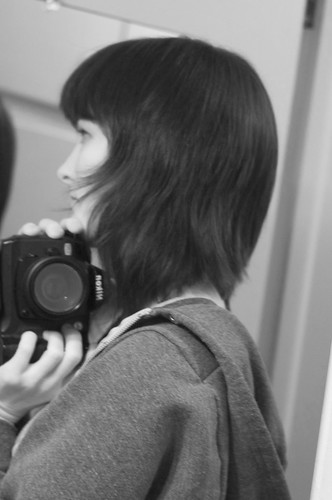
Done! Just like any other haircut it will look a little better after a wash (and probably would look better if I had been cutting my hair when it had dried straight and not all wavy and mushy, but remember that instant gratification thing we talked about? Anyway you can get a better idea of the results by looking at, like, any picture of me from the last year.) It also helps if you don't hold the camera at an angle that eliminates your neck. Anyway, now you look like an 80's chick-rocker. Put on some eyeliner and bang your head around a little. This haircut is very easy to maintain, since to trim the ends all you have to do is put it up in that ponytail again. If the layering is a little too drastic for you and you want to minimize the Joan-Jett-i-ness, trimming an inch or so off the longest, bottommost layer (perhaps with the help of a friend) will tone it down. If it's still too long, go back to the beginning and take a little more off this time.
Optional step (that makes it slightly less easy to maintain): I prefer for my hair to have a slight angled-bob thing going on, with it a little shorter in the back and longer in the front. It eliminates that little ducktail effect you see in the photo above (and to which my hair is prone for some reason.) To do that, just do the same thing you just did, except with a ponytail at the back of your head instead of the top. Obviously, plan ahead for this step since it will take a little length off too.
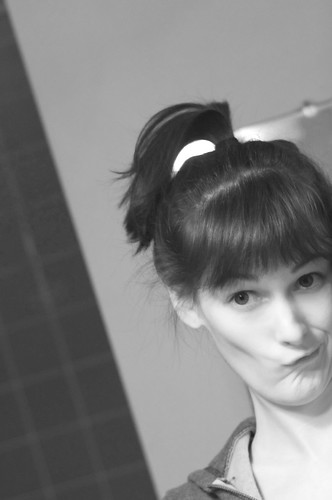
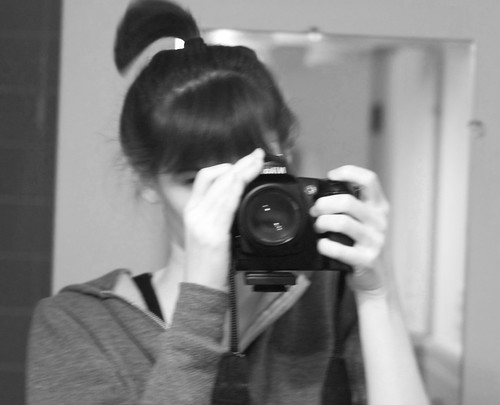
(That is like, a picture of a reflection of a reflection. It is pure luck and chance that I actually got an in-focus shot of the body part I was aiming for.) Voila! You now have a crappy free haircut! Next time I do my bangs I'll see if I can get Travis to take photos- that one I don't think I can shoot on my own (not that I did a super bangup job this time, but hey.)
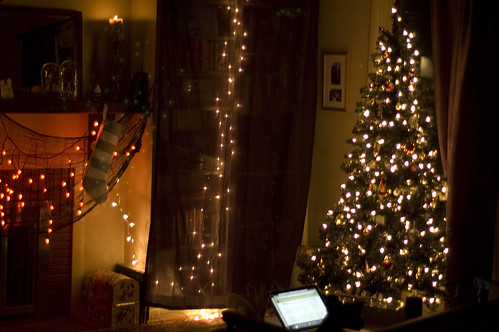
So I decided a little while ago that I was sad about never getting to use Halloween decorations... we don't generally have parties since most of our friends come into town around Thanksgiving and Christmas, and this year we weren't even in this country.
So this year, we're having Halloween for Christmas. And I am having way too much fun with it.
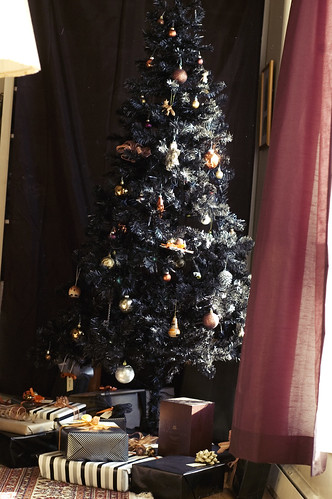
So without further ado, the tree:
I don't know if you know this, but fake black Christmas trees are really difficult to photograph... especially in a small space with weird light and a prime lens and a curtain that can't be moved any farther away :-P This is literally the only angle where I could get the (almost) whole thing in the frame. (The next posts will look a little better, I promise.)
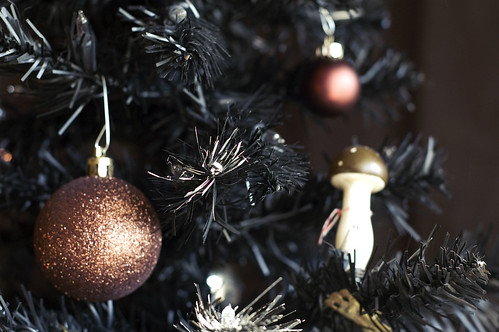
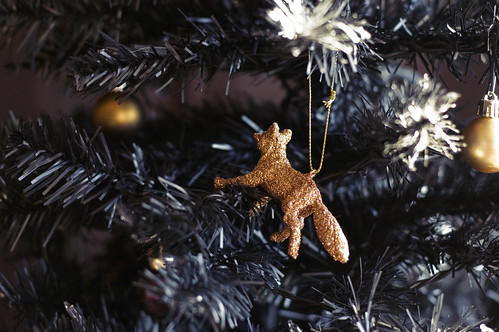
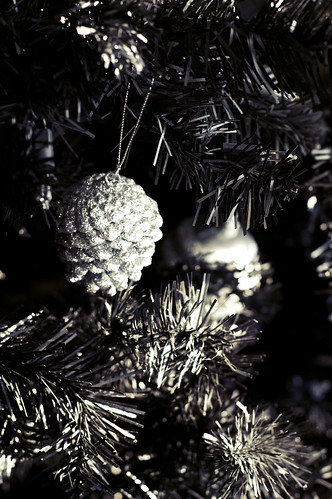
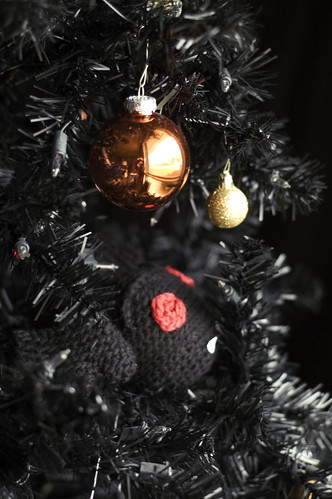
Much to my husband's chagrin, I restricted the ornaments to shades of orange, brown, gold, silver, gray, black, and a little white. I think there's also a tiny touch of purple.
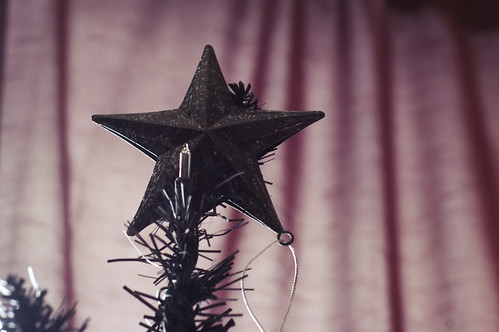
We still need a tree topper :-( I keep forgetting to look for a boring blank star that I can cover in orange glitter. Because glitter is what Christmas and Halloween are all about.
Look, it's Tiny Bat!
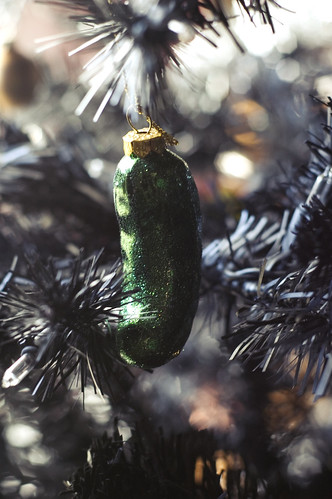
Gotta have a christmas pickle! It's not quite as fun when there are only two of you in the house though.
Personally I've never used Instagram much, partially because I'm not a huge filter person but also because I didn't like having to sign in every time and I didn't really want to use their platform for sharing, I just wanted to use the photos on twitter or whatever. So I've amassed quite a collection of other silly camera apps which I am all too happy to share with any Instagram refugees. (Note, I use all of these on an iPhone, I'm not sure which, if any, have Android versions. Also, I ignore their sharing functions and just save the photos into my iPhone library and go from there. A few will do that automatically.)
Very simple, straightfoward- some of the filters are a little more subtle and tasteful than in some other apps. Admittedly not very powerful considering what some of the free apps can do.
This app has some very cool features... unfortunately you can't apply them to existing photos, you have to actually take the photos in the app. Which means I never use it. But they do look cool, and it's free.
This is a great app. Tons of filters, then tons of layers that can go on top, then tons of frames. Using all three is kind of a bit much a lot of the time (as you can see) but it's good to have options. Does more than Instagram ever did, and for free.
Bob filter, Devine overlay, Hassel frame.
Aviary (free, but you can pay in-app for more options)
More than a filter app, Aviary actually lets you edit things like brightness and contrast and white balance. But it does come with some filters, and stickers, and the ability to add text and memery.
San Carmen filter, stickers, text, and "meme"
And of course, there's the classic...
Hipstamatic ($.99 at the moment, I think it's usually $1.99)
Ignoring the fact that putting "hip" in the name of something is a terrible way to sell it to hipsters... this app is kind of fun to look at but a bit obnoxious to use. It takes way too long to do...anything, and again, you have to shoot in-app, no editing pictures in your library. The finished photos are admittedly kind of cool looking, though, and like a film camera, you don't actually know what they're going to look like until they come out, adding a degree of suspense and thrill to your mirror-shot selfies and lunchtime documentation.
Different but related, this app is basically the Instagram of video. Again, you have to actually shoot in-app. In this exceedingly boring snippet, you can see me scroll through most of the different lenses and films. The lighting was too severe for it to handle, here, but I don't know, could be kinda fun if you're into making stupid little films.
If you're Photoshop savvy, you can also download collections of Instagram-esque Photoshop Actions (I can't remember where I got the set I have, but google around a bit and you'll find plenty.) There's also the in-browser version of Pixlr-o-matic, which does similar things with any file you upload. I find it hard to get those photos to save correctly, though, so I don't use it much (they don't save as jpgs so I have to convert them, and sometimes some of the filters don't seem to "stick," it's weird.)
Or, of course, there's stuff like this, and this, and this... If you want to be super extra cool and spend a lot of money producing photos that everyone will assume are Instagrammed anyway. (Oh the sad plight of the film photographer.)
Just remember, nobody cares that you ate a perfectly round pancake that kinda looked like an eclipse


.JPG)

.JPG)
.JPG)
.JPG)
.JPG)
