Pages

Showing posts with label hair. Show all posts

Friday, August 22, 2014

Dyeing Dark Brown Hair with Henna

I've been using henna to dye my hair for awhile now. I started with the Lush products (detailed here) but ultimately their overpowering perfume smell and relatively fast-fading results were not doing it for me anymore. I'd heard good things about hennaforhair.com but was a bit overwhelmed (there's a lot of info and a lot of choices, there, haha!) and never got around to ordering. Eventually I came across Henna Color Lab, which has lots of lovely premixed colors and really pretty darn good prices, so I gave 'em a whirl.

I started with the Natural Black a few months ago. This is the color you see in all my recent outfit posts, and in the "before" picture here:

bombasine.com- dyeing hair with henna, before


(though it is just now starting to fade a little.) It gave me a great, neutral-toned, long-lasting, super-dark-brown...but it wasn't black. And I'm itchin' for black, lately. It's tough to get a good black without using the cancer-loaded stuff, so I haven't done it in years.

For true jet black, I've always heard that doing an application of pure henna first followed by an application of pure indigo (rather than mixing the two) was the way to go. So that's what I decided to do, though as you'll see, it didn't quite work out as planned...

So first, the henna:

bombasine.com- dyeing hair with henna, during


Left henna for almost two hours and got this:

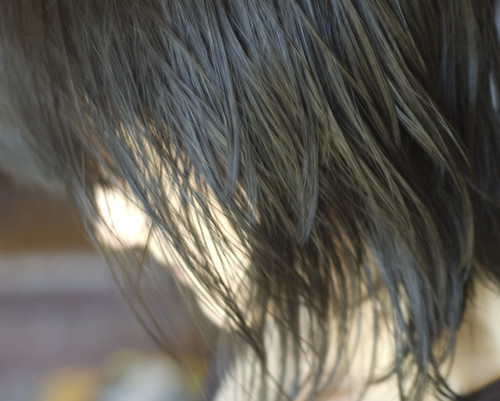
bombasine.com- dyeing hair with henna, after
Infinite hair photo!

bombasine.com- dyeing hair with henna, after


Annnnd I LOVED it. I thought just plain henna would probably turn my hair strange and brassy, but it was just like a lovely red glaze, and surprisingly natural looking (I've never used a commercial dye that actually resulted in natural-looking dark red-brown hair.) So for the moment, the indigo will wait. I still do plan to aim for black for the winter, but for now, I am digging the reddish.

Some notes/tips: 

- buy your own plastic cap and gloves, because the ones that come in the kit aren't very good. The tighter the gloves, the better, because the muck is sticky and will pull loose gloves right off your hands. While you're there, look for ear caps- they're like tiny shower caps for your ears, and they're awesome.
- They say to mix the powder with hot water until you get a "pudding-like" consistency... mine was super lumpy, but it was fine. I mushed it a bunch with my hands just to be sure. Having it be a little on the thick side helps it go on without too much splatter.
- Speaking of splatter... this shit looks like, well, shit. Do not have people over until you've had time to thoroughly clean your bathroom, because it is almost guaranteed that you will have tiny blobs of what appears to be poop stuck to various surfaces. Not a pretty sight. But potentially useful in practical joking?
- People say henna is super messy, but I don't think it's worse than regular hair dye, really... unlike normal hair dye it doesn't stain immediately, so if you wipe it off your skin fast enough it won't leave too much of a mark. (It will, of course, stain your skin... that's henna's primary use, after all. But at least you don't have to panic about what chemical nastiness you're getting on your hands- at worst you'll just be a little colorful.) Rinsing is a bit of an adventure, but unlike the Lush stuff that seems to rinse out in chunks, this stuff dissolves pretty well.
- It smells herby. I find the smell a little obnoxious but not horrifically awful (unlike Lush and chemical dyes.) Once you've got the shower cap on, you barely smell it.
- I have heard that you can amp up the indigo by not wrapping your hair, but that sounds messy. A porous hairnet might be helpful though.
- Protip: Make yourself a super fashionable poncho out of a garbage bag.

Um, so this post is about two months old, but I waited so I could give you an update on how it wore over time. It has definitely faded a bit, but it still has a red tinge when the light hits it. I'll probably try the indigo pretty soon, but I'm torn as to whether to do the henna again first (as you're supposed to, to make it stick and balance out the blue tones) or just give it a whirl and see if it sticks to what's left in my hair. 


Monday, August 6, 2012

12 Ways to Party with Mr. Coconut Oil

Today I'd like to talk to you about a very good friend of mine: Mr. Coconut Oil. Coconut oil is moisturizing, naturally antibacterial/antiviral/antifungal, very affordable, packing lots of vitamin A, C, and E, and a buttload of antioxidants.... plus, it's delicious. Unless you are one of those people who can't stand the scent or is wildly allergic to it, I strongly recommend you arrange a meeting.

Specifically, I've been relying on the good Doctor:


....but I'm sure any nice organic virgin oil is fine. I'm actually slightly less enamored with this one now that it's almost gone and I can't fit my hand in the jar to get the last of it out. Needs a bigger opening, darnit!

1. Moisturize.....everything.
This stuff works as lotion, massage oil, cuticle and nail oil, lip "balm" (y'know, except the part where it's liquid and not a balm)... I've even heard it's great for dry noses in the winter, just grease up a finger and jam it on up there. Hope you like the smell of coconuts! As oils go, coconut is on the lighter side and absorbs easily, though it's easy to go overboard, so start with just a dab. You can also drop some in the tub and have a nice moisturizing soak (just beware of slippery tubs.) Apparently it's safe for use on pets, too (though I'd do a little more research before using it on them or giving it to them, just in case.) It could be great for cracked winter paws, provided my dogs don't decide to lick it off immediately. Already moisturized your entire body (and your pet's?) Try conditioning wood or leather with it.

2. Oil-cleansing (and make-up removal)
Have you heard of oil cleansing? That site talks about it at length (and uses a different sort of oil) but the basic premise is this: rub oil into your face, let it dissolve the gunk in your pores, wash it off. I go a step further and let it sink in overnight, which I figure means it's doubling as a night time moisturizer. Then when I shower in the morning, the skin-gunk is nice and ready to rinse away. Coconut oil is also great for removing make-up, though you will be left greasy so it's definitely more of an end-of-the-night remover, not a "oops I messed up" remover.

3. Hair Treatment
Coconut oil apparently rocks for hair. According to an article in the Journal of Cosmetic Science:

"The findings clearly indicate the strong impact that coconut oil application has to hair as compared to application of both sunflower and mineral oils. ...

Both sunflower and mineral oils do not help at all in reducing the protein loss from hair. This difference in results could arise from the composition of each of these oils. Coconut oil, being a triglyceride of lauric acid (principal fatty acid), has a high affinity for hair proteins and, because of its low molecular weight and straight linear chain, is able to penetrate inside the hair shaft.

Mineral oil, being a hydrocarbon, has no affinity for proteins and therefore is not able to penetrate and yield better results. In the case of sunflower oil, although it is a triglyceride of linoleic acid, because of its bulky structure due to the presence of double bonds, it does not penetrate the fiber, consequently resulting in no favorable impact on protein loss."

So that seems like a good thing. It will of course, make your hair greasy, so this is another thing to do before you wash, or possibly overnight. I always end up getting it all over my hair when I'm doing the nighttime moisturizing thing anyway.

4. Deodorant
Please allow me to direct your attention back to this tutorial. True, I will probably try pure shea butter next time, but the coconut oil has worked well and I've enjoyed having armpits that smell like delicious desserts.

5. Perfume?
Ok this one's kind of cheating, because pretty much any one of these things will leave you smelling coconutty anyway. But provided you get an oil that hasn't be refined beyond the point of smelling, it does linger. Bad if you don't like coconut-smell, good if you do (I will say that I really dislike fake coconut smell- this is a breed apart.) I quite enjoy waking up in the morning and realizing that my feet and legs still smell edible from the oil I slathered on last night. So even if you didn't use coconut oil for anything else, you could totally dab a little on for the scent.

6. Hairspray
Mostly water + blob coconut oil + blob aloe + small blob hair gel + generous pour of sea salt + spritzer bottle = really nice, nourishing hair texturizer. I use this almost every day now and it actually seems to have made my hair softer, plus it gives it that nice scruffy-beachy-look. Totally smells like a beach, too.

7. Temporary tattoo removal
Ok I realize this isn't a problem that most adults have. But I recently went to a circus-themed party as the "Temporarily Tattooed Lady" and believe me when I tell you I know a thing or two about fake tat removal.

Step 1: Slather some coconut oil on that sweet ink. Let it soak in.
Step 2: Rub it a little. If you're lucky, it'll totally dissolve at this point and come right off. Maybe 1/6th of the tats in that picture did that. If not, proceed to...
Step 3: Get in a very hot shower (or bath if bathing with little tattoo bits doesn't squick you out) and hang out there awhile til you're feeling all good and steamy. Don't wash the oil off, but don't be afraid to get it wet either. Scrub the the tattoos enthusiastically with a rough washcloth. Pretty much all of them came off this way, though some required more elbow grease than others. Afterwards, regular ole soap should help rinse away the sticky scumblobs. Be prepared to clean the tub if you're removing them in great quantity.

tattoos2
Sup?


8. Tattoo aftercare (and healing in general)
Speaking of tattoos, I recently got a little ink test done (a tiny dot of a tattoo to see if my skin would react negatively to the ink) and used coconut oil during the healing process with success. (Don't tell my tattoo artist, who wanted me to use crap-laden Lubriderm. Ew.) The key is to put it on really, really thinly- like wipe some on, then dab gently it with a clean paper towel (never fabric- you want something borderline sterile) until it's no longer shiny. You want it to breathe. Now, obviously this was just a little dot, and I'll report back after I use it for the actual tattoo...but from my googling, it sounds like I'm definitely not the first, and I feel much better putting something natural and food-grade on my mashed-up flesh than something full of nasty chemicals. It also sounds like it's great for just about any skin-healing you need to do. I regularly put it on my constantly-irritated legs and it does seem to soothe the beasts. Folks with skin conditions like eczema have reported some success as well.

9. Lube
Family members look away! I have not actually tried this, but from what I've read, coconut oil is a fine, ah, "personal lubricant." Obviously you're not going to want to mix it up with latex (oil melts latex or something. Not sure if that includes vegetable oils or just mineral/petroleum but I don't think you want to be the one to try it, amirite?) Now, I would've thought that having something edible up in your lady business was an invitation for trouble, but apparently you can actually use it to TREAT yeast infections and other nasties. Hot damn. (Plus, it's legitimately safe to eat and doesn't taste bad. That's probably handy.)

10. Make soap
I haven't yet delved into the world of proper soapmaking (lye, scary,) but coconut oil is a super useful ingredient for folks who do! Lends lather and hardness, two fine qualities for soap to have.

11. Get rid of those upper arm bumpies
Y'know, the "chicken skin", aka Keratosis Pilaris. Turns out coconut oil helps with that! Some people recommend eating it for this purpose but I'm not sure how that's supposed to help, besides just being generally good for your health. But I stumbled across this article the other day and when I looked down at my own arms I realized, hey, mine are almost totally gone! Cool! I've had those stupid bumps forever and totally got rid of them by accident. Maybe it's the same idea as the oil-cleansing, and it dissolves away whatever skin and oil and gunk causes the bumps. Don't much care as long as it works. Woohoo!

12. Eat it, duh

Ostensible nutritional benefits of coconut oil:
- Rich in vitamins and antioxidents (ie shit that keeps you from aging and is generally great for you)
- Knocks out h.pylori and treats stomach ulcers
- Helps prevent Alzheimers
- Balances blood sugar
- Balances cholesterol
- Increased metabolism and weight loss (that one looks a bit dubious)
- Magical tropical unicorns will fly out your ass playing rainbow steel drums
- A whole bunch of other stuff you can read about here

Now, I'm sure the research is still out on some of those, notably weight loss and unicorns. But eating this stuff is probably not bad for you, in any case. On its own, it has a pretty mild, neutral taste (unexpectedly so, with such a strong sweet smell.) It apparently has the same number of calories as olive oil (even though it's white and frothy and looks like lard. Don't be fooled! It IS a saturated fat, but it's not as evil as the others.)

I asked Travis for a coconut oil recipe, but apparently he usually uses the milk, so this is all he had:

Homemade "Magic Shell"
(Remember? That weird chocolate syrup that hardens when it hits your ice cream and then you crack it with a spoon?) This stuff is fun. It's also great when you're making homemade ice cream- just pour it in the ice cream maker and you have those delicious flaky chocolate "chips".

Anyway- put 1/3 cup coconut oil and 12 oz of whatever chocolate you want in a pan, preferably a double boiler. Heat it up til the chocolate melts, stirring all the while. Remove from heat. Booyah. This stuff will be liquidy at room temperature and then harden when it hits something cold.

But if that doesn't suit you, here's like, a thousand recipes using coconut oil. You can also toss it in smoothies and stuff, or fry other things up in it.


Bonus, sort of: Sunscreen?
Some sources say this stuff is useful as sunblock. Others say not so much. One source noted that while coconut oil only blocked 20% of shitty-rays, cod liver oil blocked 90%. So if you're cool with smelling like fish, that's an option, I guess. That said, I bet that mixing coconut oil up with some zinc oxide and titanium dioxide would make a pretty sweet mineral sunscreen.

Any other suggestions for the wundernuss? Please do tell!

Friday, May 25, 2012

Tutorial: How to Dye your Hair Poop Brown

Technically, Caca Brun, but I think we all know what that means. (The name's no mistake, either. I mean, perhaps misguided from a marketing standpoint, but certainly accurate in the sense that the dye looks like caca.)

I've been an irredeemable hair dye addict since high school. I remember my mom telling me that some chemical common in hairdyes was found to contribute to things like bladder cancer (pretty sure it was paraphenylenediamine, a particularly nasty nasty, but there are plenty of unpleasant things in there.) My response was "yeah, well, that's with regular dyeing over time- I'm just doing it once!"


(shut up, it was a costume! For a themed dance party.)


....yeeaaah. Didn't turn out to be once. Turned out to be a lot of times. I've gone red, RED, orange, every shade of dark brown, black, and most recently, dark teal. A few years ago when chemical sensitivities started making hair dye even less fun that it usually is (and it's never fun, it's always stanky and burning eyes) I decided to switch to only using semi-permanents like Manic Panic, which is basically highly perfumed conditioner with food coloring in it. I went pretty much natural up until my wedding, and then did a dark teal last fall. Apparently, blue dyes stick :-/ I even put a dark brown over it and it faded out in a week, revealing a weird greenish-to-reddish ombre which was not as cool as it sounded.

henna1
(Doesn't really capture the weirdness, but it's the best I could do.)

Enter henna. I used to be super into henna body art years ago, until I realized that on my pasty-ass skin, it just turned Irish-kid-freckles orange instead of a nice rich red. But apparently you can use it on hair, too, and in combination with indigo, get lots of lovely browns. Lush made it easy for me by having these block-y things that you just grind up and mix water with, but you can buy the actual herbs too. It's supposedly nourishing, fairly permanent, and very nontoxic. I like these things.


henna2

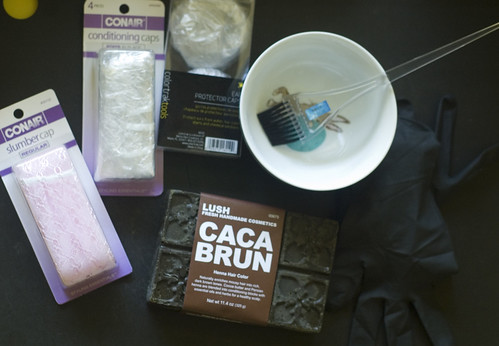
What you need to play along at home:
- Lush Caca color of your choice (I'm using Brun- I may switch to Noir later but I figured, start light, go darker.)
- A bowl
- Some sort of stirring implement
- Gloves
- A way to heat water
- A knife

These are optional but recommended
- A shower cap
- A breathable sleeping hair cap
- Mini shower caps for your ears
- Vaseline or something similar to protect your hairline
- A dress made out of a garbage bag
- Application brush, maybe.

The directions say that to maximize the red tones, you want to cover your hair up with plastic, but to encourage the indigo to develop, you want it to get air. Given that this shit is flaky and messy, I wasn't about to wander around bare-headed, hence the breathable cap. I figured I wanted it nice and balanced, so I did half the time with the plastic cap, half without. The little ear-caps are from Sally's and they're AWESOME, because you know you can never Vaseline your ears well enough to keep the dye off. And remember- henna is used for body art, that shit WILL stain your skin. Luckily it takes time to develop so if you wash it off right away, you should be ok.

henna4


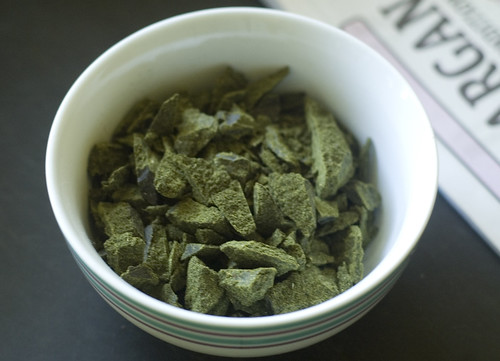
1. I used two squares of the henna for my medium-thickness, shoulder-length hair, and that was just about the perfect amount (which means two more applications left, neat!) Chop the henna into bits. Some reviews say to grate it on a cheese grater, but I don't think that's necessary. Travis wouldn't let me use his good knives, so he got the honor of chopping it with a dull steak knife. Then I decided that I want topless men in all of my tutorials.

henna3

henna5

2. Heat some water, but not quite to boiling- apparently if the water's too hot you'll cook the indigo and it won't work as well. We used the thermometer that Trav uses for making coffee and heated it to 175 degrees.

henna6
(At this point, Travis took over the camera. You can tell by the "artistic" blur.)

3. Pour some water in, let it soak in. Pour some more. Mash the blocks. Pour some more. Mash. Continue until you've got a good, spreadable texture. I went for "Hulk Manure" but I think "Baby Shit" or even "Rotten Yogurt" would've been much easier to spread. When it's too thick, it's like mashing clay onto your head and it's hard to coat every strand. Plus it dries as you're mashing and flakes everywhere. I'll definitely thin it out more next time. It will smell like a pot smoker eating a cough drop (it's much better than chemical dyes, I think, but it IS kinda smelly. I wish Lush didn't add extra perfumes to it.)

henna8

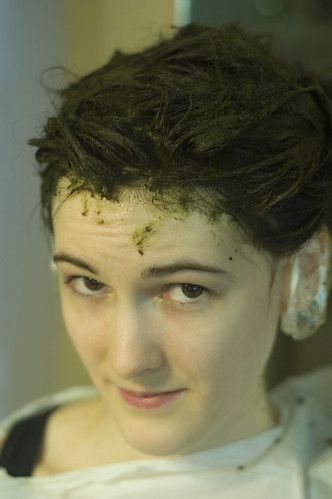
4. Work over a sink or easily cleanable surface, and smash that stuff all over your head.

henna9
"If you ever wanted to see your wife wiping shit all over her head, this is probably about as close as you're going to get," said Alex to her cameraman. His response was unrepeatable.

henna10
Those earcaps are so foxy.

5. Cap it up!

henna11

6. Clean off your skin with a wet paper towel or rag. This stuff is super messy, but it's easy enough to clean up, unlike other dyes which stain everything as soon as they touch it.

henna12
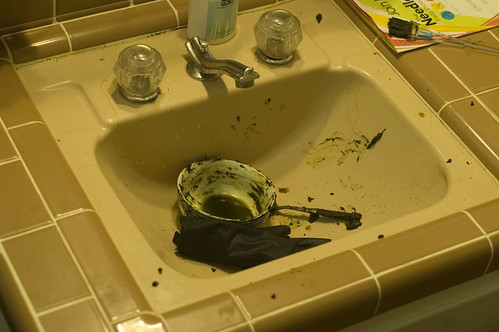
(Your sink will look like a tree ent dropped a deuce in it. And yeah, our bathroom IS that ugly. Sigh.)

7. Rip off your garbage bag dress and wait around for a few hours. Longer = deeper color. I did about two hours- one with the plastic cap, one with just the breathable head thing. It stinks way more without the plastic, FYI. I should've probably waited longer but I really wanted to take my morning shower, dangit.

8. Shower time! Oh, did I tell you to wear an easily removable shirt under your garbage bag? Well you should have. This is the hard part- get ready to look like Swamp Thing (temporarily- it'll rinse off) and stain your bathtub green (hopefully also temporarily...) So, this is what I did- I'll let you figure out what you should do, because as you'll see it didn't work super well for me. I stood under the hot water for a while and just let the crust dissolve. At some point I cranked it up as hot as I could stand to melt the cocoa butter component of the Caca (most people say it takes a few washes to get it all out.) Once the worst of it was gone, I slathered my head in ridiculous amounts of conditioner and rinsed, repeating as necessary until I didn't feel grit coming off my skull anymore. At this point I was standing in ankle-deep, dark green water, with a layer of "dirt" beneath my feet. So that was fun.


henna13

Two hours later, I realized that my hair was not going to get any drier, because it was totally coated in oils. Yeah, it's "dry" in that picture. So, it's fair to say that this shit is probably pretty conditioning, especially when you add more conditioner to it. Part of me said "it's ok, just let the dye soak in some more! Don't shampoo yet!" but a bigger part of me was like "Girl your hair feels like lard and you still smell like Lush threw up on you" so I got back in the shower and used some shampoo spiked with Dr Bronners to cut through the grease. (While I was there I scrubbed the tub with some Bronners too and got most of the green out, so yay.)

henna14

Final result: A dark rich brown with golden undertones, which goes pretty well with my complexion, so yay. In the right light, you can still see a shadow of the green tone on the ends, but it's much dampened and you wouldn't notice if you weren't looking for it. I'm surprised it's not redder. My hair still smells bad, and there are a few greasy spots that I didn't get with the shampoo (and a few flakes of henna stuck inside my ear (??)) The parts that got well-shampooed are now soft and nice. I've heard the color keeps "developing" for a few days so I'll post an update if it changes noticeably.


Pros:
- Not super poisonous!
- Cleans up with water
- Supposedly pretty permanent, or at least as permanent as "permanent" hair dyes (which always fade anyway.) I don't feel like it's going to rub off on my clothes or sheets, which is good.
- Final result is a nice color, which of course is the most important bit.


Cons:
- Messy. You'll probably find squishy chunks of green shit-like substance all over your bathroom for awhile. YOU'LL know it's not poop, but maybe consider not doing this right before having guests over.
- Smells like a hippie koala getting high in an Indian grocery store (still better than smelling like death though).
- The smell lingers. Commercial dyes sometimes do that too. But dammit, it's giving me a headache. Ugh.
- Rinsing is a little tough, to say the least.

I've got four more blocks, so I suspect I'll be back, but we'll see how this wears. Hooray for not looking quite so awkwardly multicolored!

UPDATE 6/26/12:

So, the henna faded out in like, two weeks. I'm back where I started. Very frustrating, because it was such a nice color. Once I summon up the gumption, I'll probably do it again and try leaving it longer...maybe try another brand at some point. I think I'll have to keep my hair short until all the greenish is cut out of it, though, since nothing wants to cover it completely. BEWARE THE BLUES, Y'ALL.

Though I did have some people at TNNA tell me that greenish-black was lovely on my complexion, haha.

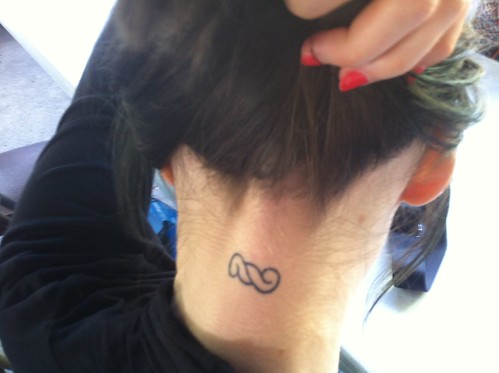
As an aside, I finally found a picture that accurately captures the greenness...ignore the fact that it's of my tattoo:


photo (15)
It's only really noticable when the light is on it like that...but still. Ack.

LinkWithin

romantica theme by Pink + Lola