Pages

Showing posts with label review. Show all posts

Friday, June 1, 2012

Clean-ish Cosmetics and Other Such Vanity

lipstick1
(Octopus, you don't even have lips.)

There are so many cleanish makeup companies out there now. They are usually sort of pricy, but I feel like I've built up an arsenal of not-too-ridiculous stuff. Try Whole Foods or another hippie-dippie grocery store- they tend to have decent stuff at the lower end of the crazy spectrum. But for posterity, here's what I've found and liked so far:
*disclaimer: none of these brands have bribed me to review their products. But I want them to know that I'm open to that sort of thing. Ahem.


We'll go in vague order of how I put stuff on.
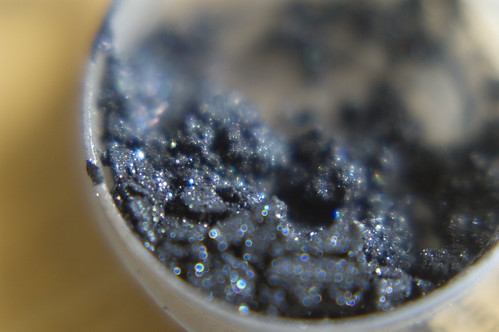
shadow5


Eyeshadow:
I start here because it's messy and I know I'll have to clean stuff up afterwards. Eyeliner can go before or after this, depending on what I'm going for, but whatever. I've mostly switched to mineral shadows, which warrant their own post because they're a pain in the ass, but I also discovered this the other day and immediately fell in love. I wish they'd make more colors in this line- Tarte is hit or miss in terms of toxicity and a lot of their stuff still has talc (no good) but this does not. But it's a pressed powder (more convenient), it's neutral, it has more than one color in one place, it's reasonably smudgeable, and I love it. It's nice and subtle and everyday-ish.

tarte1


Eyeliner:
For liquid, I have Dr Hauschka's. This shit DOES NOT COME OFF for anything. So don't fuck it up. When I use this, the remnants stay between my lash-roots for like three days afterwards (which actually looks pretty good, so I'm not complaining, but it's hard to get it off if you want it off.) That said, I've had a lot more success applying this and not making an ass of myself than any other liquid liner I've ever owned. If anything, though, I do a thin line with the Hauscha's and then do a mineral eyeshadow foil line on top of that, because it's easier to make that look not-ragged (we'll talk about that in the mineral shadow post.)

For pencils, I have brown from Honeybee Gardens and black from Gabriel. I usually like Gabriel, but the HG wins here and I'll probably buy their black at some point. It's softer and way easier to apply- the Gabriel pencil is a little too hard. I may try getting it wet or mushing the tip a bit more, we'll see. I'd like to try some of HG's other stuff, too, since I've been impressed with it so far and the prices are really reasonable. But I digress.

Now that I'm done getting eyeshadow all over my face, I can move on...

Concealer:
Gabriel again. This stuff's ok- it has a nice texture, and blends in well and has just a tinge of yellow to counteract the purpley eye bags. I think I'd really have to layer it on to get rid of them, though. It's more of a gentle eyebag reducer.

Foundation/powder/whatever:
I don't even know WTF liquid foundation is for, really, but I feel like it usually looks bad on me and I don't mess with it. I just dust this stuff on with a big brush, and then maybe sponge it on anywhere that needs a little more.
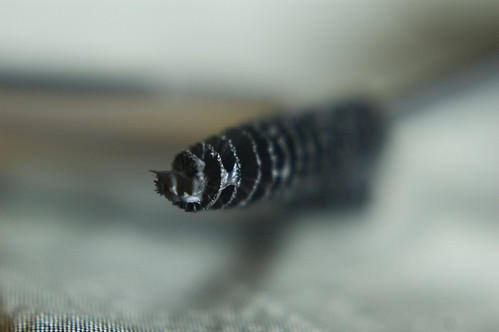
ascara1_1

Mascara:
Honeybee Gardens again. I'm really impressed with this stuff- it looks thick, but it works as well as any conventional mascara I've ever owned. It's not waterproof, but I haven't had trouble with smudging- probably because I don't make out under waterfalls or scream and cry at Bieber concerts. I had some Tarte mascara that came with their eyeshadow and compared with the HG, it was shitty and smelled bad, and I'm betting it's more expensive too.

Lip gunk:
Lipstick has taken me the longest to come around to. It always makes me feel so "done up" and it's taken awhile to just embrace that. It's ok to be done up, man! I have a few regulars that I mix and match-
Gabriel Lipstick in Pomegranate - this is my red. I'm a wimp so I usually tone it down by using it as a stain and piling one of the others on top.
Zuzu Lipstick in Golden Bronze - This is like... apricot with gold shimmer. I'm amazed that it works on me, but the lady at the store recommended it and was totally right. It's like my natural lipcolor, boosted slightly and shimmery.
Pacifica Lip Tint in Guava Berry- pretty standard tinted balm. Nice because it's moisturizing, but it smells weird.
Jen's Sanatio Skin Care Honey Mint Gloss in Apricot Blush - I kinda love this stuff actually. It smells good, it tastes good, it's mostly castor oil and honey. It's also kind of local to me- I'm not sure how easy it is to get elsewhere. I'm not sure it's particularly long wearing, but whatever.

lipstick2
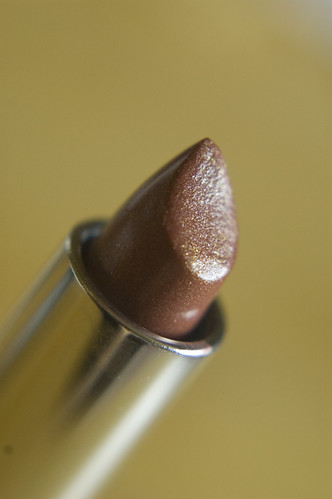
(Also, lipstick is weirdly fun to photograph.)

Much like liquid foundation, I don't really know what lip liner does or why I want it, so I don't have any :-P It makes me think of drag queen lips, mostly. But then, I'm not trying to make my makeup last through a busy day of being fancy- more like three hours of going out- so my needs may differ from those of high powered fashion execs and drag superstars.

I... don't have any blush at the moment. It's not something I've ever used much, but I probably should get some. Maybe some bronzer too. I'm pretty pasty. Recommendations are welcome, both for those things and good brands in general! Bonus points if they don't cost like $50 for one measly eyeshadow palette.

Friday, May 25, 2012

Tutorial: How to Dye your Hair Poop Brown

Technically, Caca Brun, but I think we all know what that means. (The name's no mistake, either. I mean, perhaps misguided from a marketing standpoint, but certainly accurate in the sense that the dye looks like caca.)

I've been an irredeemable hair dye addict since high school. I remember my mom telling me that some chemical common in hairdyes was found to contribute to things like bladder cancer (pretty sure it was paraphenylenediamine, a particularly nasty nasty, but there are plenty of unpleasant things in there.) My response was "yeah, well, that's with regular dyeing over time- I'm just doing it once!"


(shut up, it was a costume! For a themed dance party.)


....yeeaaah. Didn't turn out to be once. Turned out to be a lot of times. I've gone red, RED, orange, every shade of dark brown, black, and most recently, dark teal. A few years ago when chemical sensitivities started making hair dye even less fun that it usually is (and it's never fun, it's always stanky and burning eyes) I decided to switch to only using semi-permanents like Manic Panic, which is basically highly perfumed conditioner with food coloring in it. I went pretty much natural up until my wedding, and then did a dark teal last fall. Apparently, blue dyes stick :-/ I even put a dark brown over it and it faded out in a week, revealing a weird greenish-to-reddish ombre which was not as cool as it sounded.

henna1
(Doesn't really capture the weirdness, but it's the best I could do.)

Enter henna. I used to be super into henna body art years ago, until I realized that on my pasty-ass skin, it just turned Irish-kid-freckles orange instead of a nice rich red. But apparently you can use it on hair, too, and in combination with indigo, get lots of lovely browns. Lush made it easy for me by having these block-y things that you just grind up and mix water with, but you can buy the actual herbs too. It's supposedly nourishing, fairly permanent, and very nontoxic. I like these things.


henna2

What you need to play along at home:
- Lush Caca color of your choice (I'm using Brun- I may switch to Noir later but I figured, start light, go darker.)
- A bowl
- Some sort of stirring implement
- Gloves
- A way to heat water
- A knife

These are optional but recommended
- A shower cap
- A breathable sleeping hair cap
- Mini shower caps for your ears
- Vaseline or something similar to protect your hairline
- A dress made out of a garbage bag
- Application brush, maybe.

The directions say that to maximize the red tones, you want to cover your hair up with plastic, but to encourage the indigo to develop, you want it to get air. Given that this shit is flaky and messy, I wasn't about to wander around bare-headed, hence the breathable cap. I figured I wanted it nice and balanced, so I did half the time with the plastic cap, half without. The little ear-caps are from Sally's and they're AWESOME, because you know you can never Vaseline your ears well enough to keep the dye off. And remember- henna is used for body art, that shit WILL stain your skin. Luckily it takes time to develop so if you wash it off right away, you should be ok.

henna4


1. I used two squares of the henna for my medium-thickness, shoulder-length hair, and that was just about the perfect amount (which means two more applications left, neat!) Chop the henna into bits. Some reviews say to grate it on a cheese grater, but I don't think that's necessary. Travis wouldn't let me use his good knives, so he got the honor of chopping it with a dull steak knife. Then I decided that I want topless men in all of my tutorials.

henna3

henna5

2. Heat some water, but not quite to boiling- apparently if the water's too hot you'll cook the indigo and it won't work as well. We used the thermometer that Trav uses for making coffee and heated it to 175 degrees.

henna6
(At this point, Travis took over the camera. You can tell by the "artistic" blur.)

3. Pour some water in, let it soak in. Pour some more. Mash the blocks. Pour some more. Mash. Continue until you've got a good, spreadable texture. I went for "Hulk Manure" but I think "Baby Shit" or even "Rotten Yogurt" would've been much easier to spread. When it's too thick, it's like mashing clay onto your head and it's hard to coat every strand. Plus it dries as you're mashing and flakes everywhere. I'll definitely thin it out more next time. It will smell like a pot smoker eating a cough drop (it's much better than chemical dyes, I think, but it IS kinda smelly. I wish Lush didn't add extra perfumes to it.)

henna8

4. Work over a sink or easily cleanable surface, and smash that stuff all over your head.

henna9
"If you ever wanted to see your wife wiping shit all over her head, this is probably about as close as you're going to get," said Alex to her cameraman. His response was unrepeatable.

henna10
Those earcaps are so foxy.

5. Cap it up!

henna11

6. Clean off your skin with a wet paper towel or rag. This stuff is super messy, but it's easy enough to clean up, unlike other dyes which stain everything as soon as they touch it.

henna12
(Your sink will look like a tree ent dropped a deuce in it. And yeah, our bathroom IS that ugly. Sigh.)

7. Rip off your garbage bag dress and wait around for a few hours. Longer = deeper color. I did about two hours- one with the plastic cap, one with just the breathable head thing. It stinks way more without the plastic, FYI. I should've probably waited longer but I really wanted to take my morning shower, dangit.

8. Shower time! Oh, did I tell you to wear an easily removable shirt under your garbage bag? Well you should have. This is the hard part- get ready to look like Swamp Thing (temporarily- it'll rinse off) and stain your bathtub green (hopefully also temporarily...) So, this is what I did- I'll let you figure out what you should do, because as you'll see it didn't work super well for me. I stood under the hot water for a while and just let the crust dissolve. At some point I cranked it up as hot as I could stand to melt the cocoa butter component of the Caca (most people say it takes a few washes to get it all out.) Once the worst of it was gone, I slathered my head in ridiculous amounts of conditioner and rinsed, repeating as necessary until I didn't feel grit coming off my skull anymore. At this point I was standing in ankle-deep, dark green water, with a layer of "dirt" beneath my feet. So that was fun.


henna13

Two hours later, I realized that my hair was not going to get any drier, because it was totally coated in oils. Yeah, it's "dry" in that picture. So, it's fair to say that this shit is probably pretty conditioning, especially when you add more conditioner to it. Part of me said "it's ok, just let the dye soak in some more! Don't shampoo yet!" but a bigger part of me was like "Girl your hair feels like lard and you still smell like Lush threw up on you" so I got back in the shower and used some shampoo spiked with Dr Bronners to cut through the grease. (While I was there I scrubbed the tub with some Bronners too and got most of the green out, so yay.)

henna14

Final result: A dark rich brown with golden undertones, which goes pretty well with my complexion, so yay. In the right light, you can still see a shadow of the green tone on the ends, but it's much dampened and you wouldn't notice if you weren't looking for it. I'm surprised it's not redder. My hair still smells bad, and there are a few greasy spots that I didn't get with the shampoo (and a few flakes of henna stuck inside my ear (??)) The parts that got well-shampooed are now soft and nice. I've heard the color keeps "developing" for a few days so I'll post an update if it changes noticeably.


Pros:
- Not super poisonous!
- Cleans up with water
- Supposedly pretty permanent, or at least as permanent as "permanent" hair dyes (which always fade anyway.) I don't feel like it's going to rub off on my clothes or sheets, which is good.
- Final result is a nice color, which of course is the most important bit.


Cons:
- Messy. You'll probably find squishy chunks of green shit-like substance all over your bathroom for awhile. YOU'LL know it's not poop, but maybe consider not doing this right before having guests over.
- Smells like a hippie koala getting high in an Indian grocery store (still better than smelling like death though).
- The smell lingers. Commercial dyes sometimes do that too. But dammit, it's giving me a headache. Ugh.
- Rinsing is a little tough, to say the least.

I've got four more blocks, so I suspect I'll be back, but we'll see how this wears. Hooray for not looking quite so awkwardly multicolored!

UPDATE 6/26/12:

So, the henna faded out in like, two weeks. I'm back where I started. Very frustrating, because it was such a nice color. Once I summon up the gumption, I'll probably do it again and try leaving it longer...maybe try another brand at some point. I think I'll have to keep my hair short until all the greenish is cut out of it, though, since nothing wants to cover it completely. BEWARE THE BLUES, Y'ALL.

Though I did have some people at TNNA tell me that greenish-black was lovely on my complexion, haha.

As an aside, I finally found a picture that accurately captures the greenness...ignore the fact that it's of my tattoo:


photo (15)
It's only really noticable when the light is on it like that...but still. Ack.

LinkWithin

romantica theme by Pink + Lola