Pages

Monday, December 23, 2013

Making Christmas, Making Christmas...

2013christmas15
Christmas!

2013christmas10
Marmalade, you do not match, GTFO. 


2013christmas5
The floral arrangement section at Joann's is a treasure trove of sparkly miscellania for present-topping. Just make sure you have wire-cutters.


2013christmas7 
 Of course they get one. But they have to share. And neither of them will like it.


  2013christmas6 
 I know what you're thinking but it says "Curt". CURT.


  2013christmastree10 
 I found this ornament in the back of a closet in our old house in Portland. The previous residents had left it, I guess. It is huge and over the top and the back has a glittery eagle. I love it.


  2013christmastree9 
 Garlic bulb. GET IT?? 


We went with sort of a seafoamy-minty-green/white/silvery theme this year, and just reused last year's black tree to save money and time. (And when I say "we went with" I mean "I went with and Travis followed along dutifully by using the paper I provided for him.") While I do really like real trees, I can't say enough good things about not having to hang lights (the fake ones tend to come pre-lit. So nice.) Somehow I failed to get a picture of the lights over the window...or the super weird seafoam green gnome candle. D'aww. 


 And of course the deer-frame found a home by its new deer-friend:

  2013christmas16

Sunday, December 22, 2013

Dead-easy Christmas (or Any Other Holiday) Art

Dead-Easy Christmas (or any other holiday) Art- Cafblog.com


Frame of pretty much any size - glass + pretty wrapping paper. Easy!!

You can, of course, keep the glass, but if your paper has any glitter or shine it'll probably look nicer without. If you are not using glass, cut the paper a little larger than the frame calls for so that you can wrap it around the backing board and tape it into place- otherwise it's likely to try and roll up on ya.

I love this paper- I actually bought it last year and based this year's color theme around it so I could use it ;-)

Tuesday, December 17, 2013

Winter Light, Bric-a-brac

pinkroom7

pinkroom3

bricabrac1

bricabrac6

bricabrac7

bricabrac8

bricabrac9

bricabrac10

bricabrac11

I've been meaning to put up "after" pictures of our house to follow up with this post, but we seem to have reached a sort of stasis around about 80%. We still have pictures to hang, a table to move...somewhere, two couches to replace (We did buy a new one for my studio recently but it reeks of particle board so has to live in the basement til it off-gasses. Sigh.) The bedroom curtains are temporary and insubstantial, and at the moment all the rugs are in the basement, which is in complete disarray, much like the garage... but, it's our little house, and it feels like home by now. We'll get it all done eventually, but somehow it's hard to get anything done when it's cold. I just want to curl into a ball and knit and wait for spring cleaning ;-)


pinkroom1

Thursday, October 31, 2013

This is Halloween, Halloween, HALLOWEEN

Thought you guys might want to see the pentagram cage bra in action:


Halloweeny

Halloweeny

Even though I was too busy to decorate this year, and it's raining, and I'm considering eating the small amount of candy that I bought rather than figuring out how to give it to children without the dogs escaping.... I love this holiday. (Unfortunately my house is very dark at night, and the brightest place (which is still dark) happens to be this super attractive kitchen doorway. I put some cheesy filters on to help. Ha!)

For the interested:
Dress
Socks
Wings (yep, they're Pog's...and they were not very comfortable.)
Boots - they're really old so I'm amazed they still exist, but there they are! The hooks for the laces fell off of mine awhile ago so they're laceless which I like better anyway.
Bra
Horns from a Renaissance Festival, but they're made from Fimo and rope. 

Monday, October 21, 2013

DIY Pentagram Cage Bra (or: Alex Takes Her Shirt Off for Crafts)


I decided, exactly one week before I need to have a halloween costume, that my witchy-demony-scary-thing ensemble would be absolutely incomplete without one of those sassy pentagram cage things. Seriously, what is even the point of Halloween if I can't call down dark spirits with my lady lumps, amIright? Now honestly I probably would've happily paid $25 for one on etsy, but I am pretty sure it wouldn't have made it here in time, so in desperation, I turned to my old nemesis.... sewing. 

Before we start, let me say one thing: Having a dress form that is actually the same size as you are would make this about a thousand times easier. Mine is bustier than me, and it was a problem, as you'll see. Barring that, a similarly-sized assistant would be great. But if push comes to shove, you could probably do the whole thing on your own body, in a mirror. Try not to stab yourself in the tits a bunch with the needle. It hurts. 


You will need....


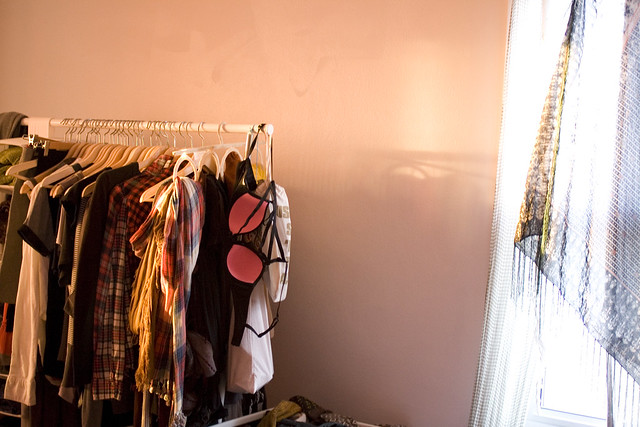
- A bra you're willing to sacrifice, with the straps adjusted the way you want them, and safety pins placed on the straps where you want the top of your star to hit (I went for the collarbone area.) Black is classic, but go nuts. Many of the harnesses you can buy are JUST elastic and then you wear them with whatever you want, but this seemed simpler to execute. I may try the other sort later, once I forget how much I don't like sewing.


- Elastic. I used a narrowish width but you could go wider, it would just require more sewing and probably be a bit less forgiving. This pack came with 6 yards and that was plenty- but I'd say get at least that much, in case you fuck it up somehow. I think you could do this with ribbon as well- it'd be easier to sew, but maybe less forgiving? Not that the elastic is that forgiving anyway...
- Needle
- Black thread (or whatever matches your elastic)
- Pins (safety, and possibly straight.)

Now, if you've ever drawn a five-pointed star, which you almost certainly have since you are a human being, this will be easy.


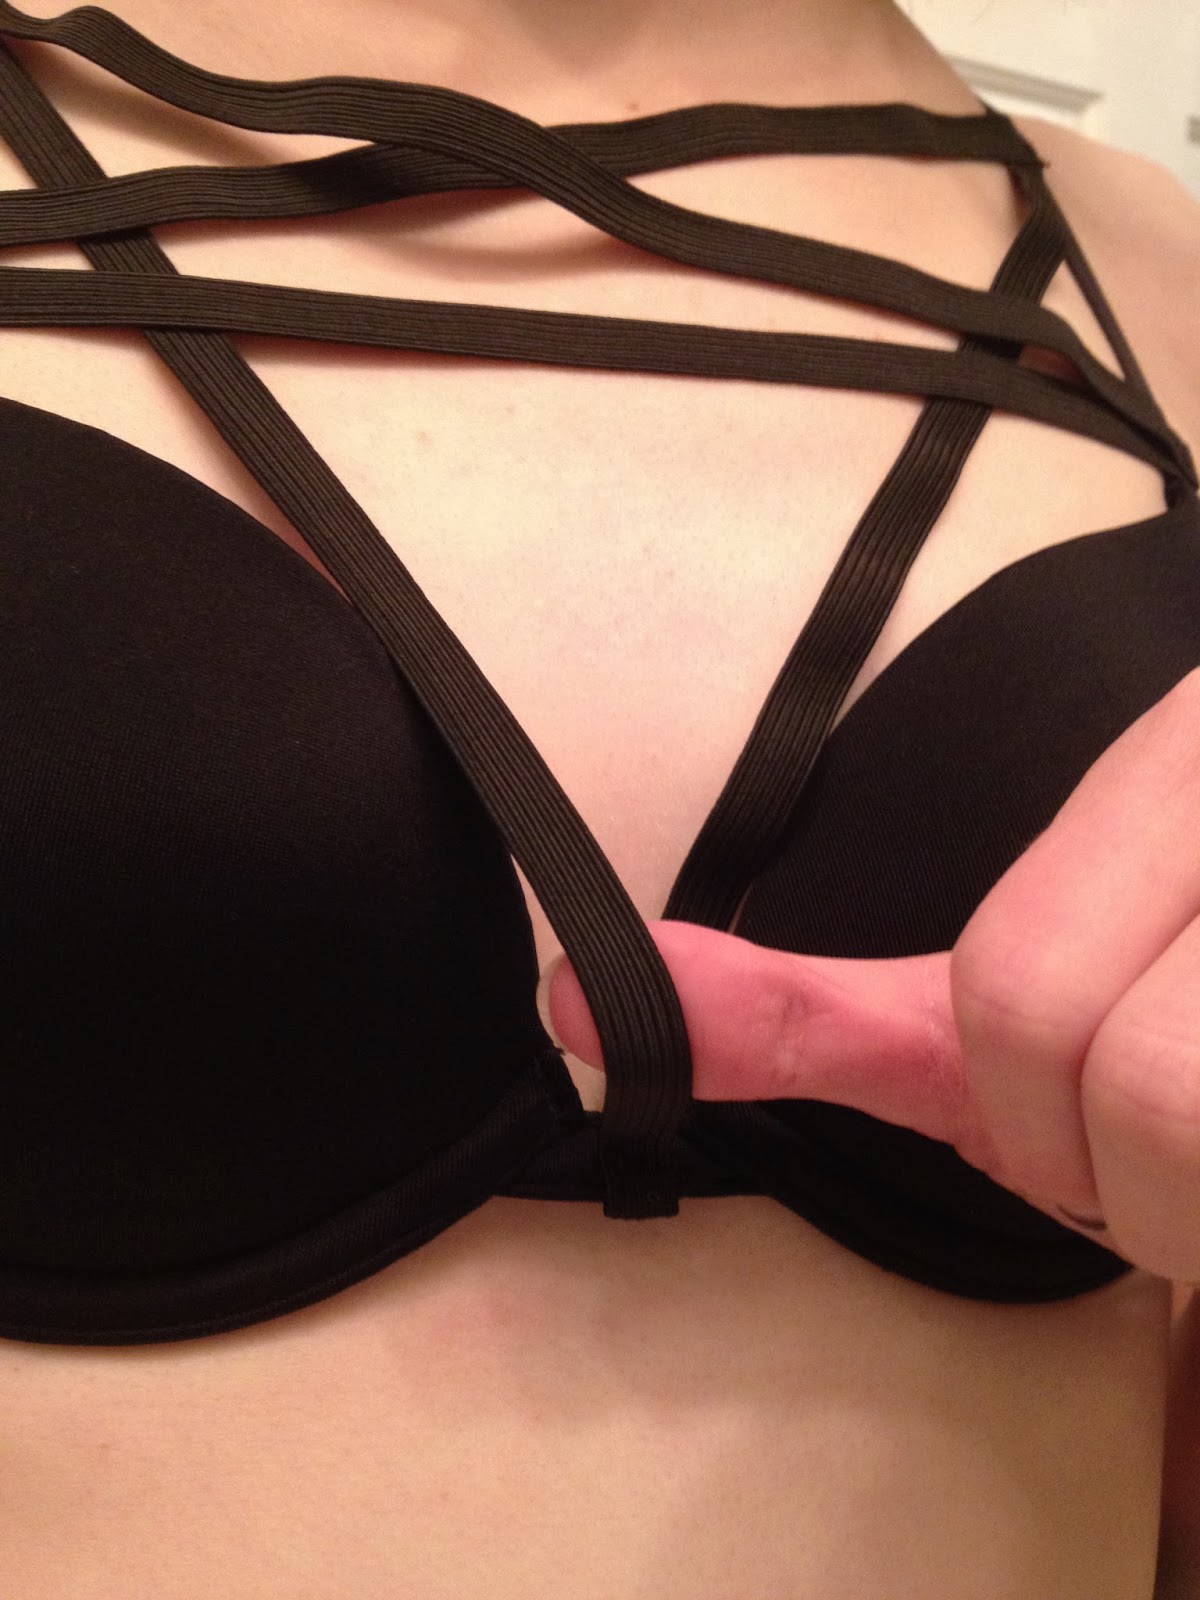
1. Start at one pin, dip down and around the middle part of the bra, and head back up to the second pin. If you're using a dress form you can hold everything in place with straight pins; if it's on a human you should probably go for safety pins even though they're a bit obnoxious and imprecise. As you go, you want the elastic to be flat and taut, but NOT stretched. If it's stretched, it will pull in at the straps and scrunch your bra up and generally be a hot mess.


2. Fold the elastic neatly (shown in the photo below) and head down to wherever you want the side arms of the star to hit- I recommend just above where the bra cup ends. Pin.


(I considered wrapping the elastic AROUND the strap but didn't try it. Could work maybe. Feel free to give it a whirl (and please report back.)


3. Go straight across to the other strap.


4. Now, back up to the beginning. Yay! At this point, if you have it on a dress form or another person, you're probably going to want to safety pin all the joints and try it on. Try to pin the elastic in two places per pin, so that it doesn't get all loosey-goosey (if that makes sense, errr...) 

5. If all is well, sew that baby! If you're smart/have a sewing machine, you could just tack each joint down with a few hand stitches and then machine the heck out of them for maximum sturdiness. If you don't have a machine, or if you're a deadbeat like me who doesn't want to dig it out of the labyrinth of unpacked moving boxes in the basement, just hand stitch the heck out of it. Just a big ole clusterfuck of messy, random stitches until you feel like those straps aren't going anywhere. 

6. Remember, with a vengeance, why you're a knitter, not a seamstress. 


7. Try it on to make sure it's still fitting well and not all loose and wonky because your damn fit model is bigger than you. If you need to make adjustments, it's okay to cry a little, we're all friends here. (I did not. I am brave. I just made a very angry face.) I ended up just ripping the stitches out of the bottom V and folding the excess under and sewing the whole mess in place, so that I didn't have to cut it. That loose strap across the top actually looks fine in person, I think it was just wavy because of the way my arm was positioned while taking the picture. I did end up sewing one stitch through the X in the middle of my chest to make sure it crossed right in the center, though (the pentagram is symmetrical but I, alas, am not.) 

8. Finish any cut ends with some clear nail polish, or one of those anti-fray liquids. You could probably burn the ends, too, but try it on a scrap first. 


Here's the finished product!


Yes, I posted a picture of myself in a bra on the internet for you, dear readers. Because I love you. And I want you to remember this when I turn up in a sleazy sidebar advertisement that promises to help you "Meet Local Goth Sluts Today!" It's all for yoooou.

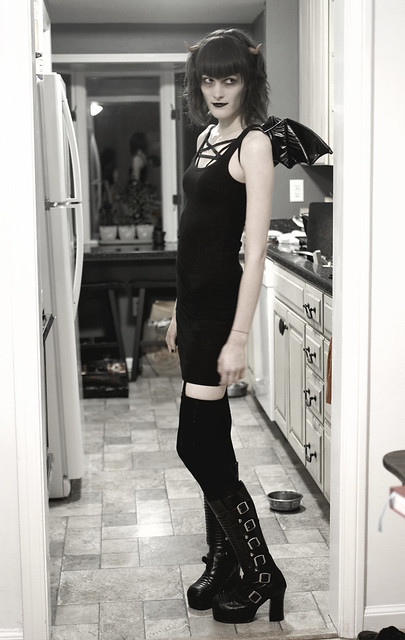
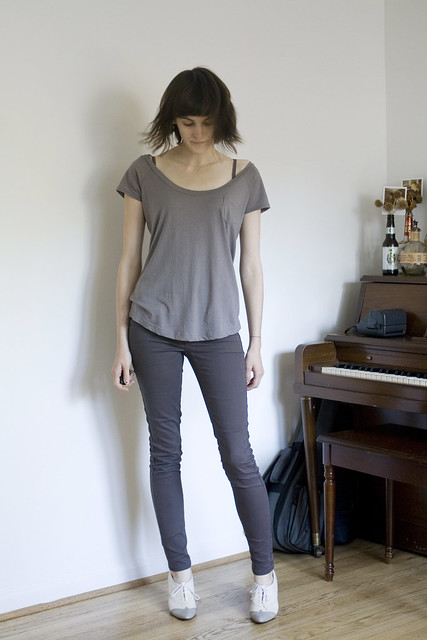
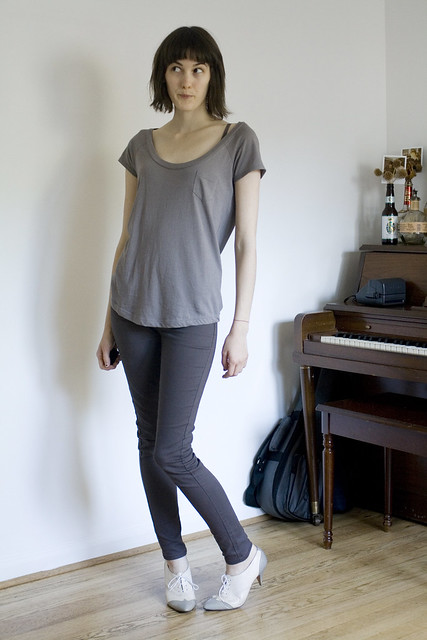
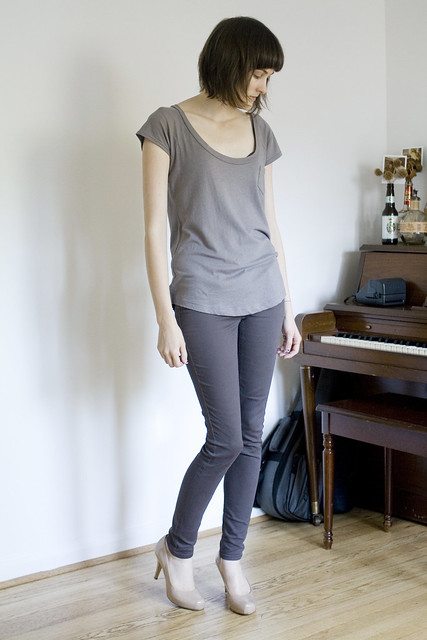
Anyway, this is how I imagine it actually being worn most often (unless you spend a lot of time in fetish clubs):


Probably you'd go with a dark top, so as not to look like you're about to enter a wet t-shirt contest, but I wanted to make the contrast clear. 

Finally, grab your favorite demonic dog-friend, and go witch some shit up!


Totally unrelatedly, putting wings on a dog is a great way to make them hate you.

Wednesday, September 4, 2013

Outfit: September 3rd

Gray Outfit Sept 3 2013 
Pants: Blue Spice 
Shoes: Vintage, "The Touch of Nina" 


1. I love gray. 
2. How is my hair doing that!?!? 

Here's a slightly better look at these crazy shoes- I found them at some secondhand place in Portland. Love love love. 

  Gray Outfit Sept 3 2013 

In the interest of science (yes.... science... that's it...) I also tried some dull but reliable nude heels (Madden Girl- I don't actually recommend these, I have to tape them onto my feet to keep them from slipping off.) 

  Gray Outfit Sept 3 2013 
 Acceptable.

Tuesday, August 20, 2013

BEST SALAD EVER


I've been trying to bully my chef husband into writing up some of his easy go-to recipes so I could post them here, but he seems to be what I guess you'd call an "intuitive" chef (at least when cooking at home.) Which means that extracting specific amounts out of him is nearly impossible, because he doesn't understand how someone could need that. Even though I need that. Which he should know, because whenever I have to apply my own oil and vinegar to something, I fuck it up and text him to complain. But anyway, I tried my best because I really wanted to share this salad with you.

Let me tell you about this salad.

It's the best goddamn salad ever. 


I am not what you would call an enthusiastic eater of salads. I hate the way lettuce tastes, and I'm very neurotic sensitive to textures when it comes to veggies (example: the crunch of snap peas is okay, the crunch of bean sprouts is disgusting.) But this salad? I will hoover it up like it's made of sweet, sweet oxygen.

It's really all about the strawberries, goat cheese, and balsamic, which are three flavors that probably live in a new-agey three-way marriage where they all love each other very much because they are so freakin' perfect for each other that I can't stand to imagine it any other way. The lettuce is really just a canvas- a nice boring surface to cut the intensity and add a little crunch. It's kind of like when you wrap a dog's medicine in cheese to trick them into eating it, except the medicine in this case is "vegetables."

But enough jabber.


The Best Salad Ever 

Makes about 2 servings

  • 3 leaves of Romaine lettuce, washed and chopped up 
  • 5 strawberries, beheaded and sliced 
  • "Some crumbles" of goat cheese (I'd estimate a heaping tablespoon? Travis was not helpful here.) 
  • "A drizzle" of olive oil (extra virgin, none of that promiscuous stuff) 
  • "A few splashes" of balsamic vinegar (yeah, vague, I know. If you have a favorite balsamic vinaigrette recipe you could probably sub that in instead of the oil and vinegar.) 
  • A small pinch of salt 
  • Optional: some chopped candied walnuts. We often leave this out because they're not super cheap, as ingredients go, and you don't really NEED them, but they're tasty. 


Mix that shit together. Eat it. Marvel at the fact that most of the things in it are actually pretty healthy.

Thursday, August 15, 2013

Outfit: August 14

Aug 15 2013 

Shirt: Cha Cha Vente
Shorts: Cisono
Tights: DKNY
Boots: Hunter

I'm always a little proud of myself when I actually remember that rain calls for some sort of alteration in dressing procedures. I'll happily prance around in my boots on days that are barely damp, then when it's pouring, tell myself that sneakers and jeans will be just fine and totally won't mean my legs are cold and wet all day.


(I also like that everything but the boots came from discount/dirt cheap stores (hence, no links.) We'll talk about that soon.)

  Aug 15 2013 

Here it is with complete bundling for optimal warmosity. Clashy sweater is "Maurice's" (I want to say it came from Victoria's Secret or something... it's really old. Need to get some new cardigans. Ehhh.) Hat is Sproinger.

  Aug 15 2013 

I am super into this shorts-with-tights thing (as my pinterest will attest.) I like shorts, but hate having bare legs. I like tights, but am not super gung-ho about skirts... so basically, this is perfect. I'm so glad we're getting into the season where I can wear such a combo without looking completely insane (especially since Michigan decided that fall begins in August this year. I actually saw a tree changing colors already.)

  Aug 15 2013 

 ^^^ and of course, the secret weapon to protect the toes of your tights. It won't, however, stop this from happening. Damn dogs. I really liked those tights, too :-(

Tuesday, August 13, 2013

Peeing in Your Wedding Dress By Your Own Damn Self


Things I love: Fluffy wedding dresses, staying hydrated, my bridesmaids.


Things I don't love: Having the third help me handle the first in order to deal with the consequences of the second. 


I figured this trick out just prior to my wedding, as my dress was (as you can see) particularly unruly and I didn't really love the idea of employing a small army to help me keep it out of the toilet water (though my bridesmaids were willing, bless 'em.) Had it been a bit easier to get in and out of, I might have just taken it off, but no- that was a complicated, multi-person operation as well, involving a whole bunch of lacing and carefully placed safety pins and chicken cutlets- not to mention being topless in a public restroom.

And of course, I'm the kind of person who has to pee every thirty minutes, and more often when I'm nervous. And as a confirmed germaphobe, I was definitely NOT doing this, especially with tights on.

Luckily this little trick is cheap and amazingly effective- plus it's easy to stash some extra trash bags in the bathroom, or find some at most venues if you run out. (A garment bag works well too, and lets you skip Step 3 since it already has an extra hole.)


Step 1: Start with a poofy dress.


Step 2: Add a large, sturdy trash bag.


Step 3: Tear a hole in the bottom of the trash bag that is just wide enough to fit your feet through. Aim to keep it small- it will expand as you pull it up your legs, but you want it to fit tightly.


Step 4: Step into the bag and pull your feet through the hole. This is WAY easier if you take your heels off, but in case of super gross bathroom floors, it can be done. Stand near a wall so you don't topple, though.


Step 5: Pull the top of the bag up and start loading your dress-fluff into it, while keeping your feet pretty close together so you don't widen the hole too much. Some of the dress-fluff will inevitably try to escape through the foot hole, but it's not a big deal and you can just shove it back up in there.


Step 6: Shimmy the bag up your body carefully, making sure to get all the dress-parts, ribbons, trains, etc into the bag.


Step 7: Once the foot-hole is around your waist, you can gather the slack at the top of the bag and hold it in one hand, leaving the other free for... bathroom... tasks.


Voila! Look at you, using the potty all by yourself like a grown-up! Once you're done, just rip that sucker off like the Hulk (make sure you step AWAY from the toilet water first) and go back to your party. (It's not really worth trying to re-use the same bag, since the hole will get all loosey-goosey.)

Disclaimer: If you're wearing a dress that easily creases, I can't promise that this won't wrinkle it a bit...but that might be unavoidable even with bridesmaid assistance.

Also, for anyone interested, my dress was designed by this gal, who I can't recommend highly enough! It also was a lot less dirty and rumpled back then, haha. 

LinkWithin

romantica theme by Pink + Lola