Pages

Showing posts with label henna. Show all posts

Friday, August 22, 2014

Dyeing Dark Brown Hair with Henna

I've been using henna to dye my hair for awhile now. I started with the Lush products (detailed here) but ultimately their overpowering perfume smell and relatively fast-fading results were not doing it for me anymore. I'd heard good things about hennaforhair.com but was a bit overwhelmed (there's a lot of info and a lot of choices, there, haha!) and never got around to ordering. Eventually I came across Henna Color Lab, which has lots of lovely premixed colors and really pretty darn good prices, so I gave 'em a whirl.

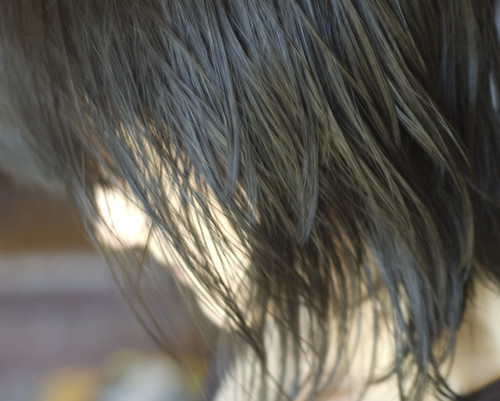
I started with the Natural Black a few months ago. This is the color you see in all my recent outfit posts, and in the "before" picture here:

bombasine.com- dyeing hair with henna, before


(though it is just now starting to fade a little.) It gave me a great, neutral-toned, long-lasting, super-dark-brown...but it wasn't black. And I'm itchin' for black, lately. It's tough to get a good black without using the cancer-loaded stuff, so I haven't done it in years.

For true jet black, I've always heard that doing an application of pure henna first followed by an application of pure indigo (rather than mixing the two) was the way to go. So that's what I decided to do, though as you'll see, it didn't quite work out as planned...

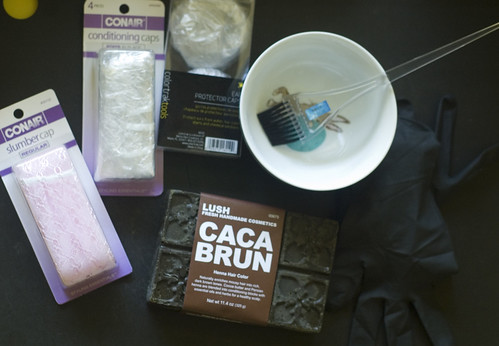
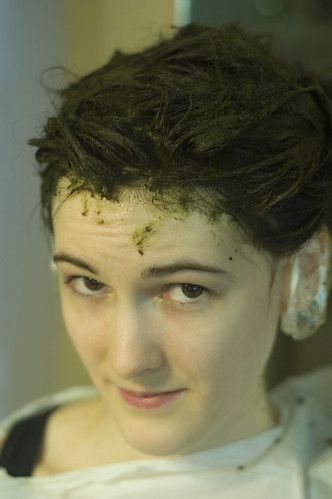
So first, the henna:

bombasine.com- dyeing hair with henna, during


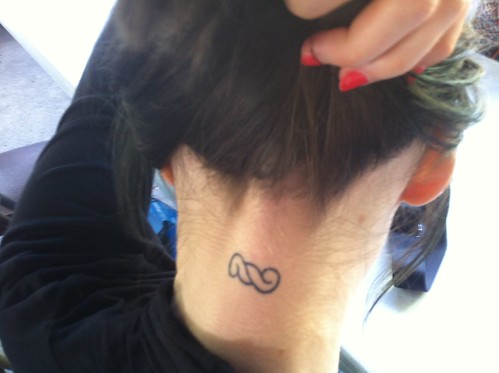
Left henna for almost two hours and got this:

bombasine.com- dyeing hair with henna, after
Infinite hair photo!

bombasine.com- dyeing hair with henna, after


Annnnd I LOVED it. I thought just plain henna would probably turn my hair strange and brassy, but it was just like a lovely red glaze, and surprisingly natural looking (I've never used a commercial dye that actually resulted in natural-looking dark red-brown hair.) So for the moment, the indigo will wait. I still do plan to aim for black for the winter, but for now, I am digging the reddish.

Some notes/tips: 

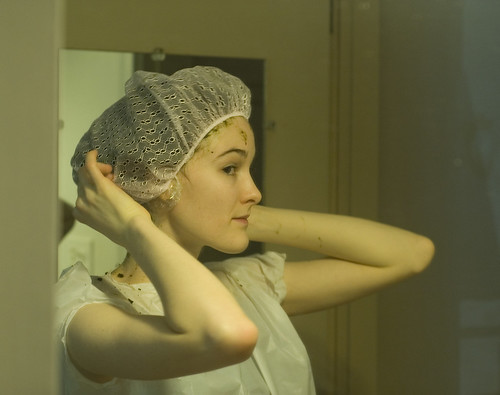
- buy your own plastic cap and gloves, because the ones that come in the kit aren't very good. The tighter the gloves, the better, because the muck is sticky and will pull loose gloves right off your hands. While you're there, look for ear caps- they're like tiny shower caps for your ears, and they're awesome.
- They say to mix the powder with hot water until you get a "pudding-like" consistency... mine was super lumpy, but it was fine. I mushed it a bunch with my hands just to be sure. Having it be a little on the thick side helps it go on without too much splatter.
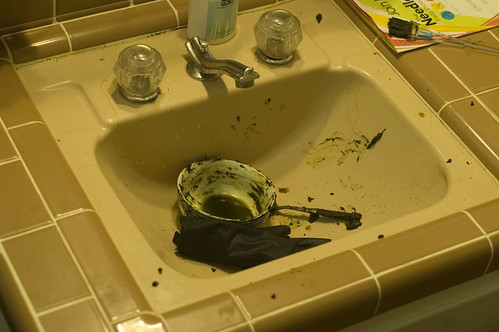
- Speaking of splatter... this shit looks like, well, shit. Do not have people over until you've had time to thoroughly clean your bathroom, because it is almost guaranteed that you will have tiny blobs of what appears to be poop stuck to various surfaces. Not a pretty sight. But potentially useful in practical joking?
- People say henna is super messy, but I don't think it's worse than regular hair dye, really... unlike normal hair dye it doesn't stain immediately, so if you wipe it off your skin fast enough it won't leave too much of a mark. (It will, of course, stain your skin... that's henna's primary use, after all. But at least you don't have to panic about what chemical nastiness you're getting on your hands- at worst you'll just be a little colorful.) Rinsing is a bit of an adventure, but unlike the Lush stuff that seems to rinse out in chunks, this stuff dissolves pretty well.
- It smells herby. I find the smell a little obnoxious but not horrifically awful (unlike Lush and chemical dyes.) Once you've got the shower cap on, you barely smell it.
- I have heard that you can amp up the indigo by not wrapping your hair, but that sounds messy. A porous hairnet might be helpful though.
- Protip: Make yourself a super fashionable poncho out of a garbage bag.

Um, so this post is about two months old, but I waited so I could give you an update on how it wore over time. It has definitely faded a bit, but it still has a red tinge when the light hits it. I'll probably try the indigo pretty soon, but I'm torn as to whether to do the henna again first (as you're supposed to, to make it stick and balance out the blue tones) or just give it a whirl and see if it sticks to what's left in my hair. 


Friday, May 25, 2012

Tutorial: How to Dye your Hair Poop Brown

Technically, Caca Brun, but I think we all know what that means. (The name's no mistake, either. I mean, perhaps misguided from a marketing standpoint, but certainly accurate in the sense that the dye looks like caca.)

I've been an irredeemable hair dye addict since high school. I remember my mom telling me that some chemical common in hairdyes was found to contribute to things like bladder cancer (pretty sure it was paraphenylenediamine, a particularly nasty nasty, but there are plenty of unpleasant things in there.) My response was "yeah, well, that's with regular dyeing over time- I'm just doing it once!"


(shut up, it was a costume! For a themed dance party.)


....yeeaaah. Didn't turn out to be once. Turned out to be a lot of times. I've gone red, RED, orange, every shade of dark brown, black, and most recently, dark teal. A few years ago when chemical sensitivities started making hair dye even less fun that it usually is (and it's never fun, it's always stanky and burning eyes) I decided to switch to only using semi-permanents like Manic Panic, which is basically highly perfumed conditioner with food coloring in it. I went pretty much natural up until my wedding, and then did a dark teal last fall. Apparently, blue dyes stick :-/ I even put a dark brown over it and it faded out in a week, revealing a weird greenish-to-reddish ombre which was not as cool as it sounded.

henna1
(Doesn't really capture the weirdness, but it's the best I could do.)

Enter henna. I used to be super into henna body art years ago, until I realized that on my pasty-ass skin, it just turned Irish-kid-freckles orange instead of a nice rich red. But apparently you can use it on hair, too, and in combination with indigo, get lots of lovely browns. Lush made it easy for me by having these block-y things that you just grind up and mix water with, but you can buy the actual herbs too. It's supposedly nourishing, fairly permanent, and very nontoxic. I like these things.


henna2

What you need to play along at home:
- Lush Caca color of your choice (I'm using Brun- I may switch to Noir later but I figured, start light, go darker.)
- A bowl
- Some sort of stirring implement
- Gloves
- A way to heat water
- A knife

These are optional but recommended
- A shower cap
- A breathable sleeping hair cap
- Mini shower caps for your ears
- Vaseline or something similar to protect your hairline
- A dress made out of a garbage bag
- Application brush, maybe.

The directions say that to maximize the red tones, you want to cover your hair up with plastic, but to encourage the indigo to develop, you want it to get air. Given that this shit is flaky and messy, I wasn't about to wander around bare-headed, hence the breathable cap. I figured I wanted it nice and balanced, so I did half the time with the plastic cap, half without. The little ear-caps are from Sally's and they're AWESOME, because you know you can never Vaseline your ears well enough to keep the dye off. And remember- henna is used for body art, that shit WILL stain your skin. Luckily it takes time to develop so if you wash it off right away, you should be ok.

henna4


1. I used two squares of the henna for my medium-thickness, shoulder-length hair, and that was just about the perfect amount (which means two more applications left, neat!) Chop the henna into bits. Some reviews say to grate it on a cheese grater, but I don't think that's necessary. Travis wouldn't let me use his good knives, so he got the honor of chopping it with a dull steak knife. Then I decided that I want topless men in all of my tutorials.

henna3

henna5

2. Heat some water, but not quite to boiling- apparently if the water's too hot you'll cook the indigo and it won't work as well. We used the thermometer that Trav uses for making coffee and heated it to 175 degrees.

henna6
(At this point, Travis took over the camera. You can tell by the "artistic" blur.)

3. Pour some water in, let it soak in. Pour some more. Mash the blocks. Pour some more. Mash. Continue until you've got a good, spreadable texture. I went for "Hulk Manure" but I think "Baby Shit" or even "Rotten Yogurt" would've been much easier to spread. When it's too thick, it's like mashing clay onto your head and it's hard to coat every strand. Plus it dries as you're mashing and flakes everywhere. I'll definitely thin it out more next time. It will smell like a pot smoker eating a cough drop (it's much better than chemical dyes, I think, but it IS kinda smelly. I wish Lush didn't add extra perfumes to it.)

henna8

4. Work over a sink or easily cleanable surface, and smash that stuff all over your head.

henna9
"If you ever wanted to see your wife wiping shit all over her head, this is probably about as close as you're going to get," said Alex to her cameraman. His response was unrepeatable.

henna10
Those earcaps are so foxy.

5. Cap it up!

henna11

6. Clean off your skin with a wet paper towel or rag. This stuff is super messy, but it's easy enough to clean up, unlike other dyes which stain everything as soon as they touch it.

henna12
(Your sink will look like a tree ent dropped a deuce in it. And yeah, our bathroom IS that ugly. Sigh.)

7. Rip off your garbage bag dress and wait around for a few hours. Longer = deeper color. I did about two hours- one with the plastic cap, one with just the breathable head thing. It stinks way more without the plastic, FYI. I should've probably waited longer but I really wanted to take my morning shower, dangit.

8. Shower time! Oh, did I tell you to wear an easily removable shirt under your garbage bag? Well you should have. This is the hard part- get ready to look like Swamp Thing (temporarily- it'll rinse off) and stain your bathtub green (hopefully also temporarily...) So, this is what I did- I'll let you figure out what you should do, because as you'll see it didn't work super well for me. I stood under the hot water for a while and just let the crust dissolve. At some point I cranked it up as hot as I could stand to melt the cocoa butter component of the Caca (most people say it takes a few washes to get it all out.) Once the worst of it was gone, I slathered my head in ridiculous amounts of conditioner and rinsed, repeating as necessary until I didn't feel grit coming off my skull anymore. At this point I was standing in ankle-deep, dark green water, with a layer of "dirt" beneath my feet. So that was fun.


henna13

Two hours later, I realized that my hair was not going to get any drier, because it was totally coated in oils. Yeah, it's "dry" in that picture. So, it's fair to say that this shit is probably pretty conditioning, especially when you add more conditioner to it. Part of me said "it's ok, just let the dye soak in some more! Don't shampoo yet!" but a bigger part of me was like "Girl your hair feels like lard and you still smell like Lush threw up on you" so I got back in the shower and used some shampoo spiked with Dr Bronners to cut through the grease. (While I was there I scrubbed the tub with some Bronners too and got most of the green out, so yay.)

henna14

Final result: A dark rich brown with golden undertones, which goes pretty well with my complexion, so yay. In the right light, you can still see a shadow of the green tone on the ends, but it's much dampened and you wouldn't notice if you weren't looking for it. I'm surprised it's not redder. My hair still smells bad, and there are a few greasy spots that I didn't get with the shampoo (and a few flakes of henna stuck inside my ear (??)) The parts that got well-shampooed are now soft and nice. I've heard the color keeps "developing" for a few days so I'll post an update if it changes noticeably.


Pros:
- Not super poisonous!
- Cleans up with water
- Supposedly pretty permanent, or at least as permanent as "permanent" hair dyes (which always fade anyway.) I don't feel like it's going to rub off on my clothes or sheets, which is good.
- Final result is a nice color, which of course is the most important bit.


Cons:
- Messy. You'll probably find squishy chunks of green shit-like substance all over your bathroom for awhile. YOU'LL know it's not poop, but maybe consider not doing this right before having guests over.
- Smells like a hippie koala getting high in an Indian grocery store (still better than smelling like death though).
- The smell lingers. Commercial dyes sometimes do that too. But dammit, it's giving me a headache. Ugh.
- Rinsing is a little tough, to say the least.

I've got four more blocks, so I suspect I'll be back, but we'll see how this wears. Hooray for not looking quite so awkwardly multicolored!

UPDATE 6/26/12:

So, the henna faded out in like, two weeks. I'm back where I started. Very frustrating, because it was such a nice color. Once I summon up the gumption, I'll probably do it again and try leaving it longer...maybe try another brand at some point. I think I'll have to keep my hair short until all the greenish is cut out of it, though, since nothing wants to cover it completely. BEWARE THE BLUES, Y'ALL.

Though I did have some people at TNNA tell me that greenish-black was lovely on my complexion, haha.

As an aside, I finally found a picture that accurately captures the greenness...ignore the fact that it's of my tattoo:


photo (15)
It's only really noticable when the light is on it like that...but still. Ack.

LinkWithin

romantica theme by Pink + Lola