Pages

Showing posts with label mineral. Show all posts

Tuesday, June 11, 2013

DIY Luminizer

After hearing pretty much universal raves about RMS Living Luminizer, I finally got my hands on some to give it a whirl. It is indeed a pretty awesome product- it adds just a slight shimmer to your skin, extremely subtle so you don't look like a glittery rave kid, but enough to make you look, well, luminescent, I guess. Healthy and glow-y.

But, clocking in at almost $40 for a .02 oz pot, this stuff doesn't come cheap. I got mine through Dermstore which was kind enough to throw in some free gifts and a 2 year subscription to Better Homes & Gardens, which made it a little less painful (no, I'm not affiliated, but I do like free stuff.) Still, though, it's a big investment when your beauty budget is as piddly as mine. Update: That subscription never came, BH&G says it never existed, and Dermstore never told me. Thanks a lot, jerks. 

So I took a look at the ingredients:

Castor seed oil, coconut oil, beeswax, tocopherol, rosemary extract, May Contain titanium dioxide, mica. 

So... two oils, beeswax, vitamin E (another oil and a preservative), rosemary extract which I'm assuming is for scent, and basically...mineral make-up. Titanium is generally a whitish powder and mica adds sparkle. So it's essentially like putting on a light coat of mineral shimmer, and using wax and oil to moisturize and glue it to your skin.

Hmm. I can do that. Commence experimental luminizer!

(But first a warning: melted waxyoil is not particularily easy to clean up! Cover your workspace and be prepared to soak the dishes for awhile. Very hot water helps melt it off, obviously.)


DIY Luminizer

Materials: 

Beeswax
Coconut oil
Fine-grain, shimmery mineral eyeshadow (1/4 teaspoon total shown, but I recommend more more more!)
A little pot to put it in
Microwave and microwave safe bowl
Oven mitt

I figured castor seed oil was probably used as a cost-saving measure more than a necessity, but you could use it if you wanted. Grapeseed would also probably work. I left out the vitamin E since I didn't have any handy, and coconut oil/beeswax don't exactly spoil quickly anyway. If you want a little scent, you could put a tiny droplet of essential oil in- just make sure it's not one that will irritate your skin. Mine just smells like coconut and honey, it's kind of lovely. I used 1 part beeswax and 2 parts oil, which gave me a fairly creamy texture, a bit softer than the original. To make it harder, use more beeswax; for softer, use more oil.

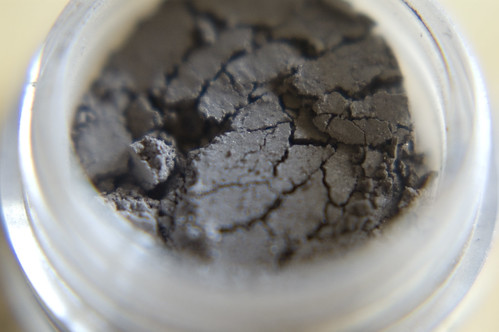
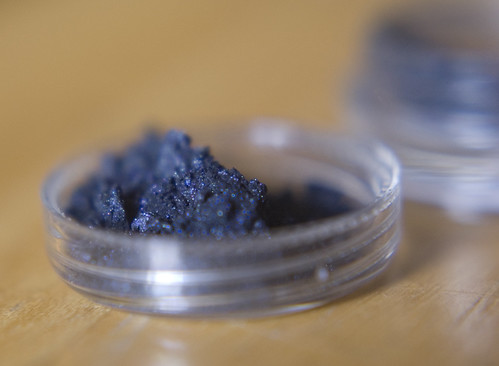
The mineral eyeshadows I used were two sample size pots from Bad Bitch Cosmetics (LOVE, btw) in Miranda and Yuki-onna (similar, but Yuki is a bit more sparkly.) You could use anything fine and shimmery- use a cooler, silver-based shimmer if your skin is cool toned, and a warmer, gold-based shimmer if you're warm toned. I thought I would need just a tiny bit of eyeshadow but I ended up dumping both whole containers in, and could've still done with more. If I make this again I think I will use twice as much, at least- unfortunately I've exhausted my supply of white-ish shimmer powders for now. In any case remember that the eyeshadow can really make or break it- go for a super-fine texture to keep from looking glittery.

DIY Luminizer Tutorial


Start by measuring out your wax and oil.


DIY Luminizer Recipe


Chop or cheese-grate the wax into little bits, which will make it easier to melt. Put the wax in the microwave safe bowl and start heating it up in 20-second intervals, stirring in between. (You could also use a double boiler for this- it would probably be easier, but with such a small amount of stuff it seemed a little silly.)

DIY Luminizer


When the wax is almost totally melted, add in the coconut oil and put it in for just a little bit longer, until it's all nice and uniformly liquid. (If you're using liquid oils, I think you can probably add them after the heating-up step. Be wary of heating any oils with a low smoke point.)


DIY Luminizer


Take the bowl out very carefully (it will probably be insanely hot at this point- use the oven mitts) and pour the mineral eyeshadow in. Stir it up well and dole into little containers.


DIY Luminizer
Attempt NOT to make a huge mess out of it. Seriously, it's like I'm 5.


Set them aside to cool.

**This part is key! **

Periodically as they are cooling, you need to go stir them up again! Otherwise, the sparkle will sink to the bottom. Eventually they will get too hard to stir, so it's imperative to hit that sweet spot when it's viscous enough to hold the shimmer in place, but warm enough to manipulate, and really mash it up.

DIY Luminizer


Result: 

DIY Luminizer

My version is a bit creamier and a bit more sheer, but it does the job! It's actually perfect as a slightly-luminizing hand cream or lip balm, at this texture. (Also, great for clavicles and other areas that you want to highlight, but where you really don't want it to look like you've got make-up on.) To truly match the original, you'd want it a little harder and with more eyeshadow- I may also try a little translucent powder to give it a drier texture. On the other hand, with a bit more oil and a yummy smelling EO, it would be a fantastically rich body lotion that would give you just a little bit of glow all over. Adding some flavor oils would make it extra awesome as a lip balm, too. Go nuts! I'd love to hear what you guys can come up with!

It's also worth noting that even though I had silvery shimmer, mine came out more warmly-toned, probably because I used yellow beeswax (white beeswax wasn't readily available locally- you can order it online though!* ) Given the ease and price, though, I'd say it's a win- you could experiment with the ratios all day and be sparkly head to toe, given that each batch probably costs about $3-5, depending on how much eyeshadow you throw in there ;-) I smell Christmas presents for every chick I know coming on... assuming I figure out how to put things in a jar without sloshing it everywhere.


*Just FYI that's an affiliate link, which means I get a little kickback if you use it, but no pressure! 

Tuesday, January 15, 2013

Eyeshadow Follow-up

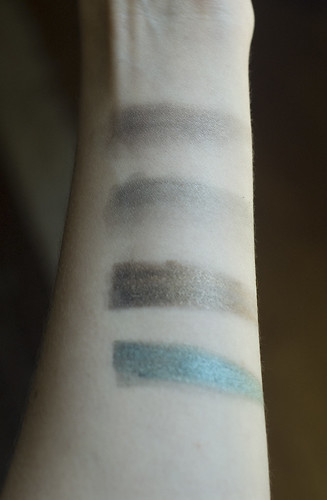
After yesterday's post I went a bit nuts and cream-i-fied pretty much all the powders I had that had enough room in their jars, using the oil & alcohol method. The diffferent powders all react a bit differently to the process- some mix easily, some definitely do not, some have dried well, some are still very liquidy (which might have to do with how much oil I added vs how much stuff was left vs the texture of the powder vs whoknowswhatelse.)

All are fairly usable, though I'm going to let a few dry out a bit more before I put the caps on.


eyeshadow9

On the top is the dry powder, bottom is the new cream. 

Monday, October 8, 2012

Foilin' yer plans

So I'm going to be doing most of the makeup for Doomsday Knits, in all likelihood... so I've been sort of homeschooling myself in the fine cosmetic arts. Yesterday was "play with foiling" day!

(Foiling involves using loose mineral pigments and either mixing them with water/liquid or applying them with a wet brush to make them very shiny and intense and opaque. I talked about it a bit here.)

Also, I've been watching Season 4 of RuPaul's Drag Race. 

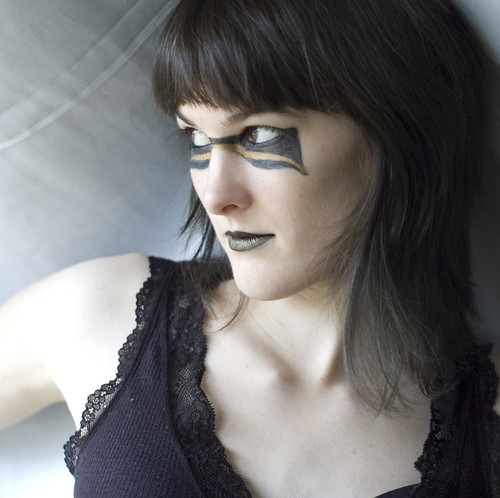
So, this happened.


makesup36


In conclusion, foiling is fun. 

Also, dark lipstick enhances my chin and makes me look like a most-likely-male glam rocker. Good to know. 

Sunday, June 3, 2012

Making Mineral Eye Shadow Your Bitch

shadow6

So when the girls at NMDL put me off products with talc at just about the time Pinterest put me onto fancy eyeshadows, I started looking around for talc-free formulas. This is not particularly easy, or cheap. Then I found out about the wide world of homemade loose mineral eyeshadows that chicks hawk on etsy for like, $3-5 a pot. And then I got super excited, and then I spent $50 on eyeshadows. If you like your makeup named after Hunger Games characters, you're particularly in luck.

Turns out these little bastards, as pretty and affordable and nontoxic as they are, can be sort of a pain in the ass to use. I'm starting to get a handle on it, though, so I thought I'd share my experience.

shadow4

The absolute most important thing to know about mineral shadows is this: Mineral shadow + water = paint. This totally changes the game when it comes to application and removal.

- Did you fuck up? Don't try to wipe it away with water. Oil, soap, and make-up remover will take this stuff off no problem, but water will make it stick harder. Oil is great at the end of the day (I use my jojoba mixture) but you're going to want some decent non-oily make-up remover for fixing mistakes. I'm using BWC and it works like a charm (I've heard it's less effective on conventional makeup, but it's fine for what I use.) My main makeup application strategy is to get it all over myself so I look like an uncoordinated clown and then clean up the edges when I'm done, so I was really suffering before I found the BWC stuff. (A lot of makeup removers and remover wipes have parabens which are no good, so, watch out for that.)

- The moisture on your hands will also make it stick a little, which is a major bummer if you're a devoted finger-smudger like me. Wrapping a little piece of tissue around my finger seems to work, or you can just smudge with brushes/sponges/q-tips, etc.

- If you manage to screw your shadow up while you're out and about, you either will have to smudge it around with some tissue, mess with some soap, or you can take the cheater way out like I do and just sort of cover it up with face powder. You could carry makeup remover with you but I'd be worried it would leak. Maybe someday I'll make some homemade wipes. I haven't had too much trouble with it smudging while I'm out, though.

- Now the upside of this water phenomenon: foiling! Mix the shadow with water or use a wet brush to apply it, and you'll get an amazing, opaque, intense color. It's fantastic for lining eyes (and I am traditionally a huge eyeliner-fucker-upper so you know it's easy.) Once it's dried on there, you can soften the edges with some dry powder or try to smudge it a bit to make it a little more subtle. It'll be pretty set on there, though.

shadow1
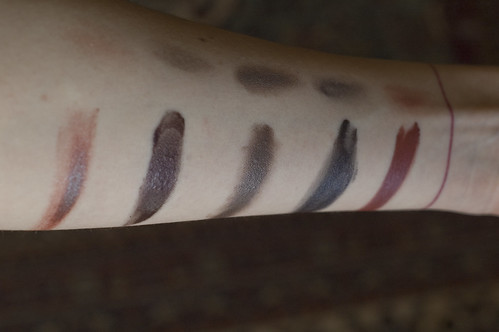
(From the top: Star-Crossed from Shiro Cosmetics applied dry, Katniss from Bad Bitch Cosmetics applied dry, Star-Crossed applied wet, Katniss applied wet. BIG DIFFERENCE.)

- If you use the powder dry, it will be pretty subtle until you've built up a few layers. Just FYI. That's not always a bad thing, though.

- Loose powder is fiesty! Tap your brush on the container and then on your arm to get the extra off before you go near your eyelid. That's especially true if you have a wet brush- the dry excess will fall off when you're trying to paint and sprinkle your face. You'll probably sprinkle your face no matter what, so I recommend doing eyes before foundation and blush or anything like that.

- On primer: I don't use that shit. Whatever. Maybe I should? I only ever want the stuff to last a few hours while I go out and so far, it's been fine.

- Practice with the stuff before you actually have to go somewhere. That's probably common sense but that doesn't mean I do it, so maybe you don't either. But do.

shadow2

Where to buy it
I bought my buttload of mineral shadows from:
BadBitchCosmetics (tons of super fun colors. Some have toxic ingredients, so pay attention. "Bowie" and "Black Swan" are gorgeous, and "Dime Piece" is a great liner color. Does awesome tiny sampler sizes.)
BLSoaps (lots of lovely neutrals.)
Shiro Cosmetics (Pretty colors, geeky themes, cult following. I am not in love with the sifter containers that they come in, but you can take the sift-y part out and just make it a regular container. I just wasn't getting enough out through the holes.)

Honestly, it seems like most of the homemade shadows are similar in terms of ingredients and efficacy- pay attention to the price vs. the size of the container vs. how awesome the colors are, because those are the things that vary.


How to make it
This is something I'd like to try someday- it seems easy enough, though you have to shell out for all the materials. Maybe I'll find someone who wants to go in on it with me. If I do get around to it, I'll report back.

I think that's it- if you guys have any useful tips I missed, let's hear 'em!

LinkWithin

romantica theme by Pink + Lola