Showing posts with label shoes. Show all posts
Sunday, July 22, 2012
Well Heeled
Things that are hard:
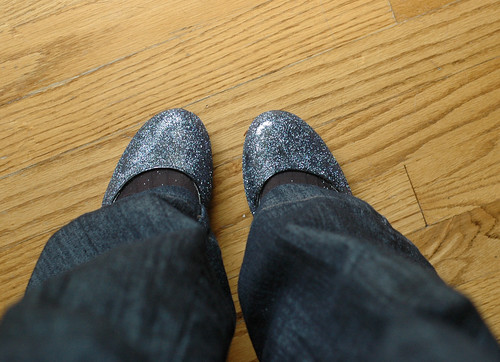
- photographing your own feet
- photographing bright red things
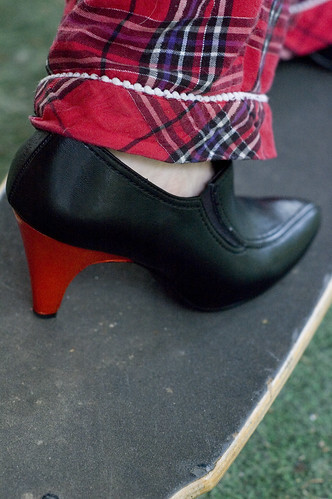
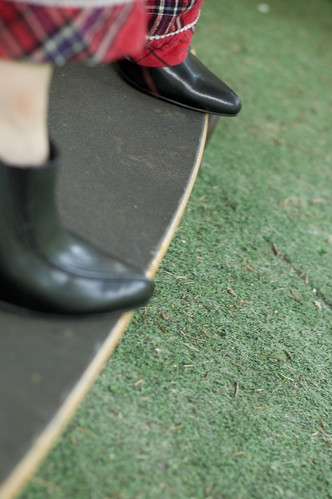
- riding a skateboard in heels
Things that are easy:
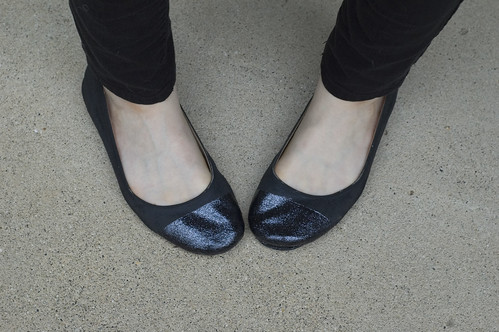
- snazzin' up yer shoes!
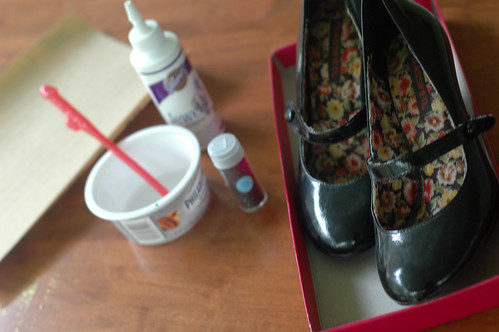
You need:
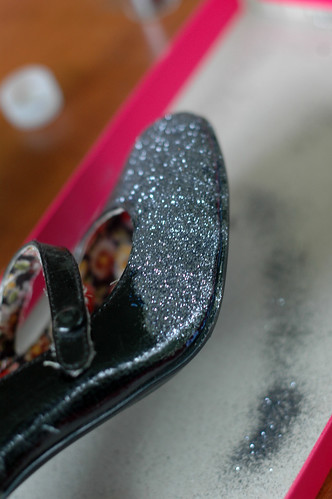
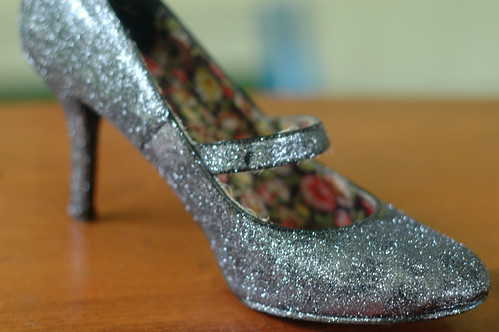
- Shoes with a hard heel (you could try it on a fabric or leathery heel but I make no promises.)
- Acrylic paint & paintbrush
- Sandpaper (somewhat optional but helpful)
- Nail polish top coat
- Masking tape (optional but a good idea.)
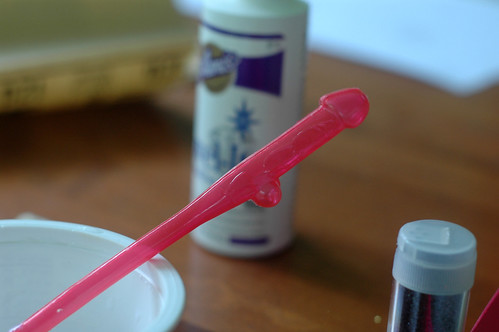
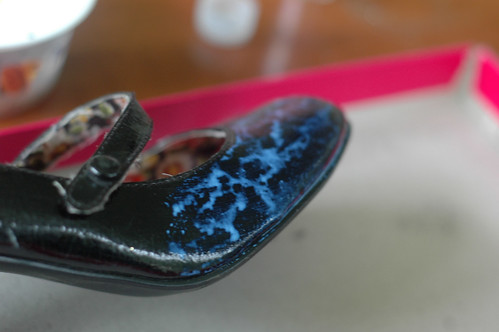
Sand the heels lightly to give the paint a better surface to stick to. Dust it off well, and put masking tape on if you want to use it to help contain your mess (it wouldn't stick to the main part of the shoes, here, but I put some on the sole. As you can see it's still a little sloppy around the edges, but it's not very noticable if you're not super close up (I might try and scrape it off, but I'm a little afraid of damaging the surface underneath.) Paint about a thousand coats of acrylic paint on that sucker, til it's nice and opaque -do thin, even coats, and let it dry in between. (These took me about a week of just walking by, doing a layer of paint, and wandering off again a few times a day.) When you're content with the opaquatude, do a final layer with the nail polish topcoat, to make it good and shiny and hopefully protect the paint. It probably won't last forever, but as long as you don't get them too wet and are reasonably gentle with 'em, it ought to stay on there awhile.
Take off the tape, put on your finest pajamas, and go for a ride.
(One of these days I'll do a craft that doesn't involve either shoes OR glitter. Probably.)
Labels:
colorblock,
diy,
heels,
shoes
Friday, July 20, 2012
Yet more glitter shoes...
So I was touching up my shoes from last year, and I thought I'd jazz up some of my plain black flats.

Glitter + modpodge + masking tape + shoes. Hooray! These shoes are pretty bendy so we'll see how the modpodge holds up.
(Also, is it just me or is the smell of modpodge seriously nauseating? I use it outside where I use stuff like, y'know, nailpolish remover and paint, and for some reason the nontoxic modpodge is the only one that gets to me.)
Friday, September 30, 2011
Glitter shoes!
This was going to be the first installment of glitter week...but after spending a half hour spitting glitter after trying to make glitter lip balm (vaseline + glitter = nope,) I'm gonna go ahead and not pressure myself. But since I caved the other day and bought this:
You can expect to see some more glittering happening real soon.
But anyway! Glitter shoes!
Neat eh?
Materials:
-Shoes you don't love anymore
-Glitter
-Glue - I used Aleene's Jewel-It because it's meant for glueing rhinestones to fabric, so I figured glueing glitter to shoes was similar. Lots of people have luck with Mod Podge though.
- A container & stir stick
- A paintbrush you can bear to part with
- A tray of some sort (I used a shoebox lid) and maybe some card stock to make a funnel (to get extra glitter back in the tube.)
- Sandpaper, if you're working with shiny shoes.
- An easily cleaned space, or a space you don't care about (our porch is now permanently sparkly) because you are probably going to make a huge mess.
And yes, I'm stirring with a penis straw, left over from my bachelorette party. Let's take a closer look, shall we?
Amazing. The sort of sick part is that they took the time to make veins on it, yet the balls are super totally uneven. Apparently realistic circulation was more important. Anyway, I figured I didn't care if it got covered in glue.
Step 1: Sand down your shoes if they're shiny and smooth. I don't truly know if this is necessary but I feel like it makes the glitter stick a bit better.
Incidentally you may recognize these shoes from this pattern. I swear I had way more people interested in buying the shoes than in making the spats, haha.
Step 2: Water down your glue (but not as much as I did- go for "paste-y", not "milky". I had a lot of dripping.) Stir it well, and start painting it on the shoes with the paintbrush, doing just one section for now.
Step 3: Glitter that bitch UP. Be generous, and hold it over your tray. You can get the extra back later. Let it sit for a second, then shake/tap it gently to get most of the extra off.
Step 4: Repeat that all over both shoes and let dry. This is what mine looked like after one coat:
Blotchy, yes, but don't panic yet.
Step 5: Retrieve your glitter, using a funnel or whatever.
Mmmglitter.
Step 6: When the shoes are dry, fill in the patchy areas the same way. Keep doing that until they're looking good. Once they're dry for the last time, stomp them on the ground outside (or somewhere easily cleaned up) to get as much extra glitter off as you can.
Done!
Mine lost some glitter on the first wearing, so I think I'm going to patch them up again and then maybe get a spray fixative to put on there (I think they make sprayable Mod Podge (!?!?!) so that might work.) And I might try mixing the glitter with the glue, next time, though from looking at other tutorials, it seems like that gives you more of a flat effect. But anyway, they held up better than I would've suspected. Do realize that you'll be leaving a trail of sparkly fairy poops wherever you go... so I suggest you go somewhere besides your house. Perhaps to the house of someone you don't like.
Subscribe to:
Posts (Atom)